Before You Begin
To create a geo-fence, your site address must be verified.
If the address is not verified, you will not be able to add or edit geo-fences. You know if a site is verify by the
How to Create a Geo-Fence
-
Go to the Site Page
Navigate to the site where you want to add a geo-fence.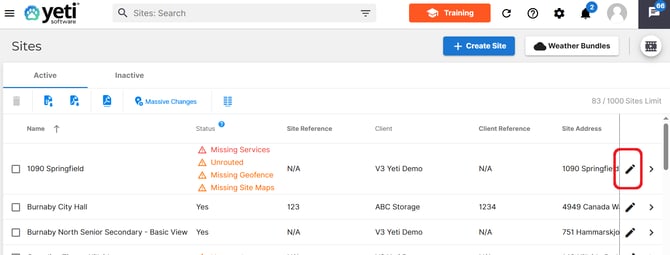
-
Select “Geo-Fence”
Click the Geo-Fence button to open the geo-fence editor.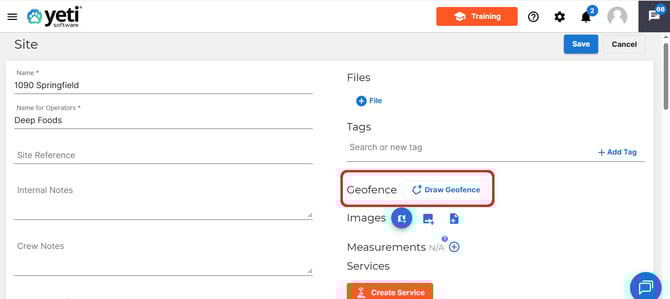
-
Select the Drawing Tool
Choose the Drawing button to start creating your boundary.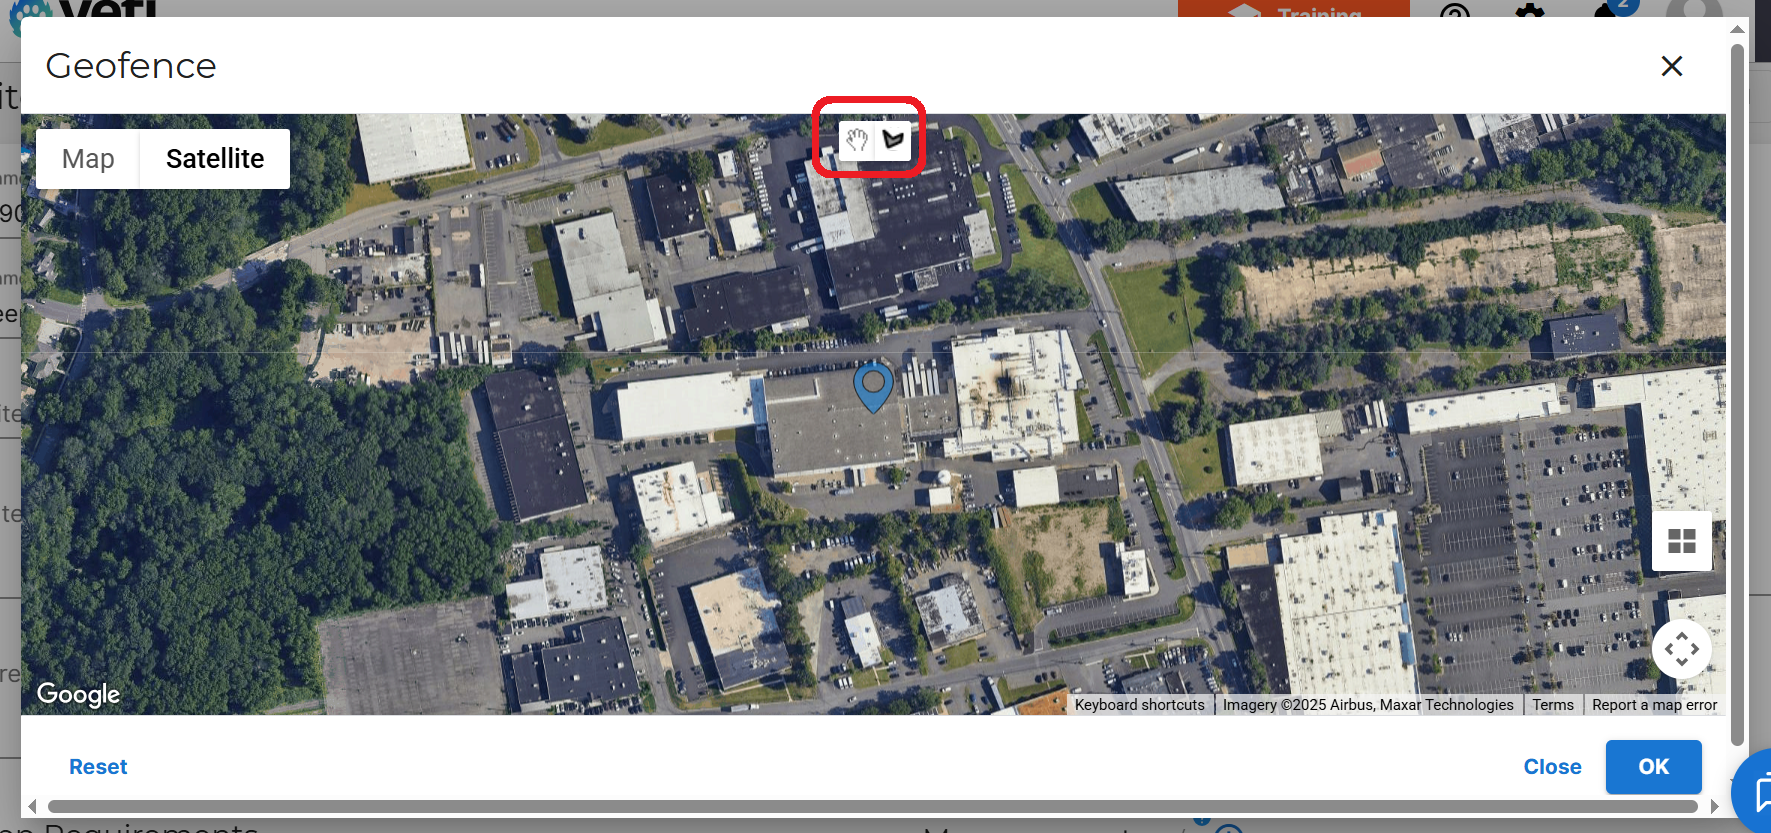
-
Draw Your Boundary
Click around your site’s perimeter to outline the desired area.
Adjust points as needed. Selet okay when don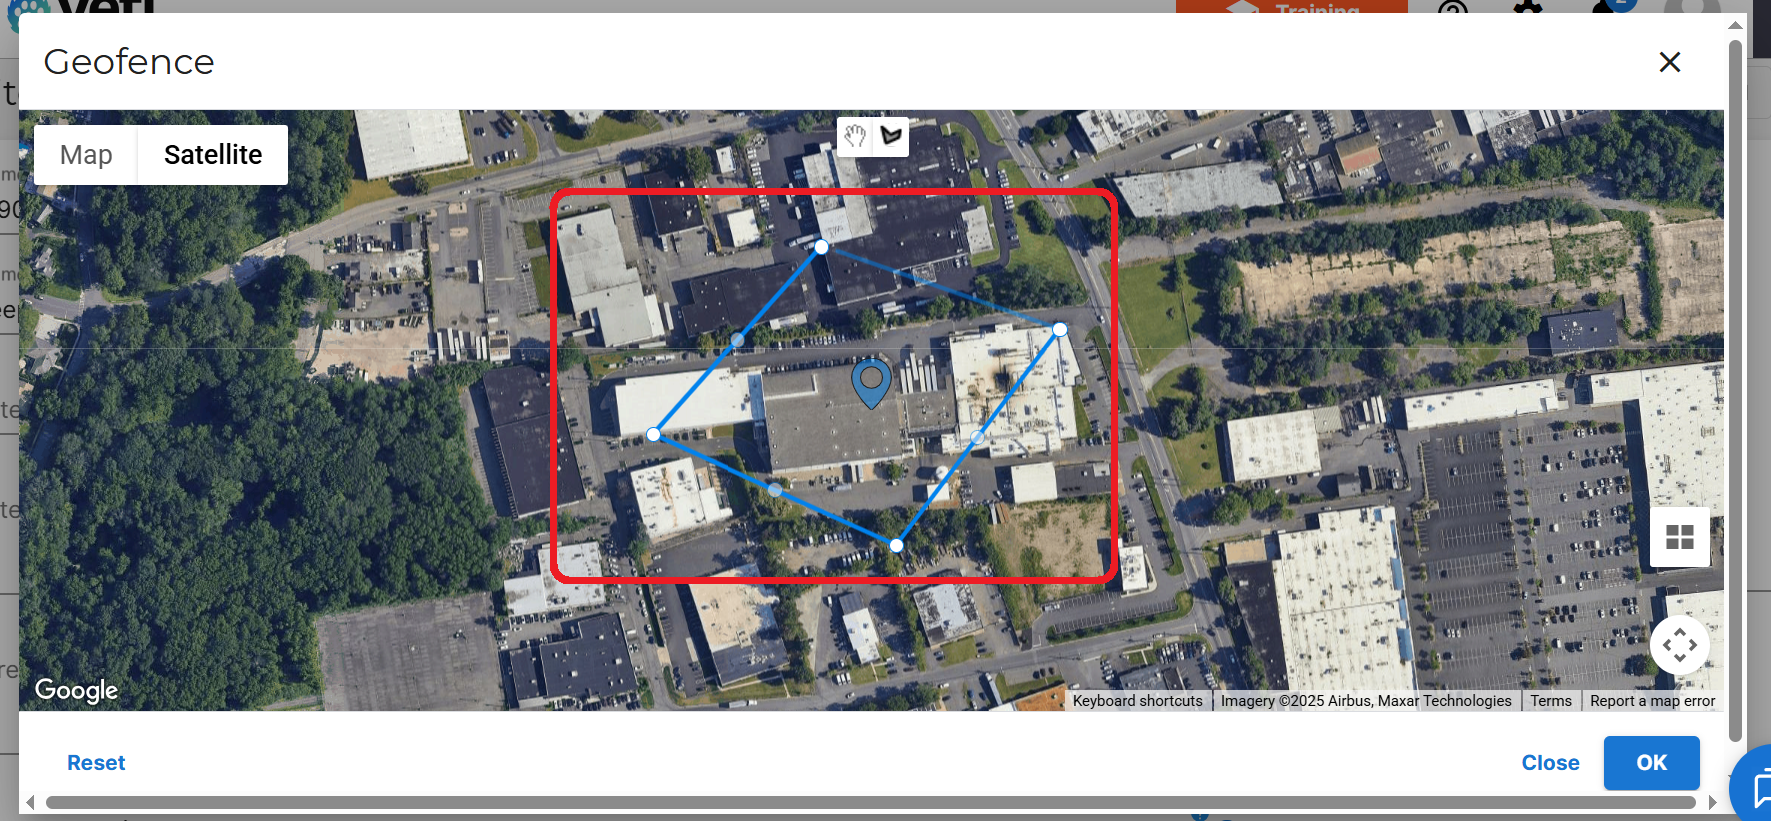
-
Save Your Geo-Fence
Once the area is outlined, select Done to save your geo-fence.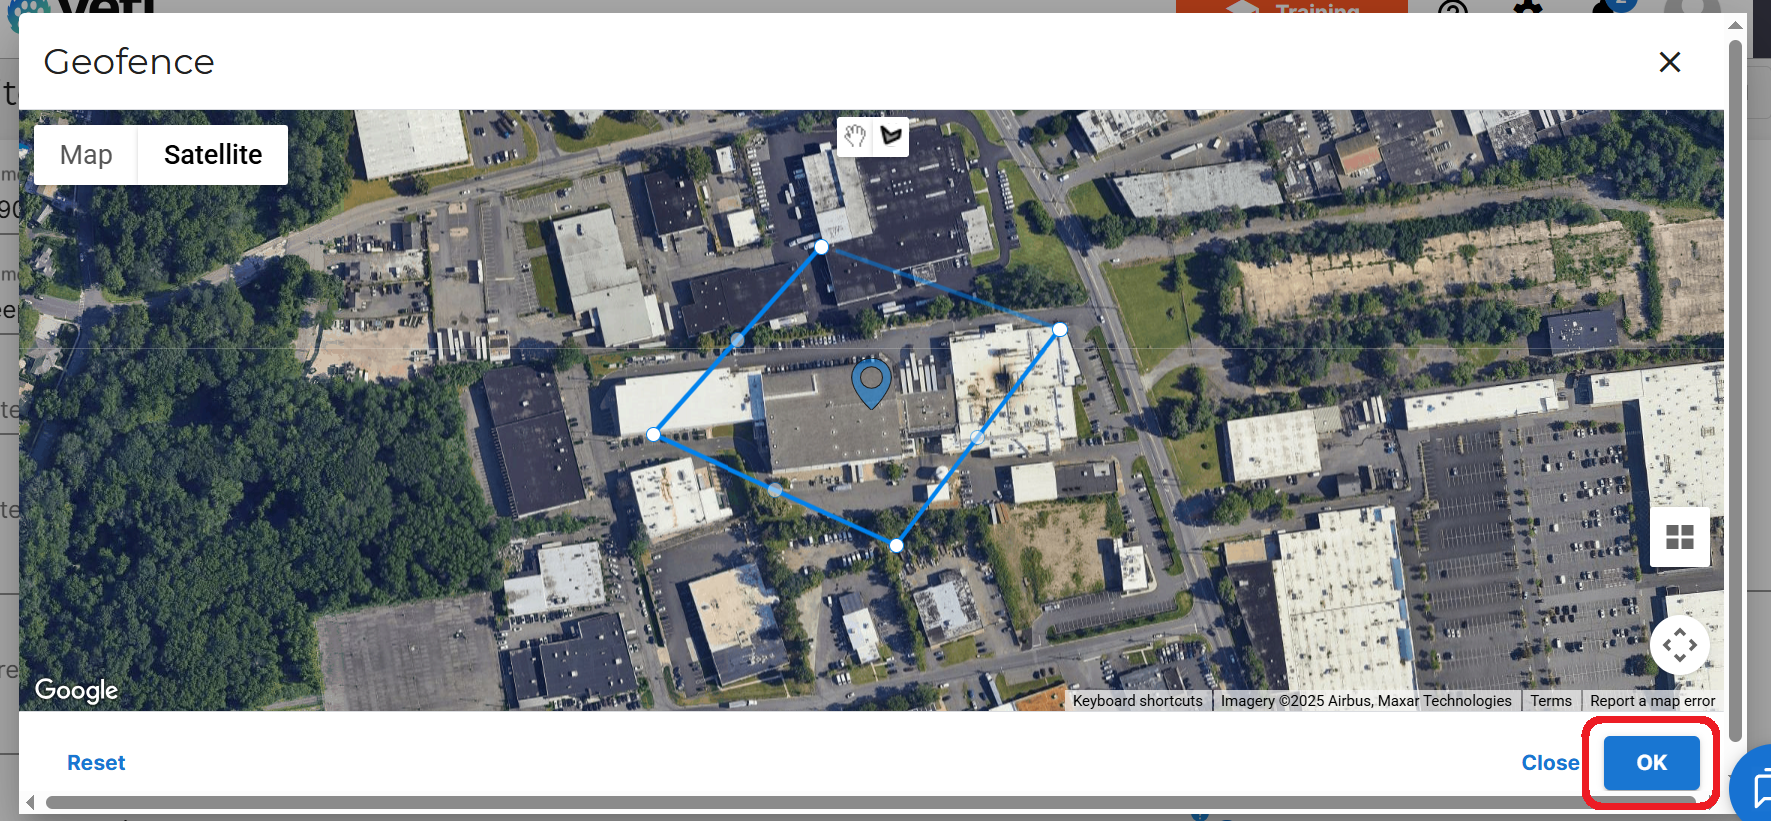
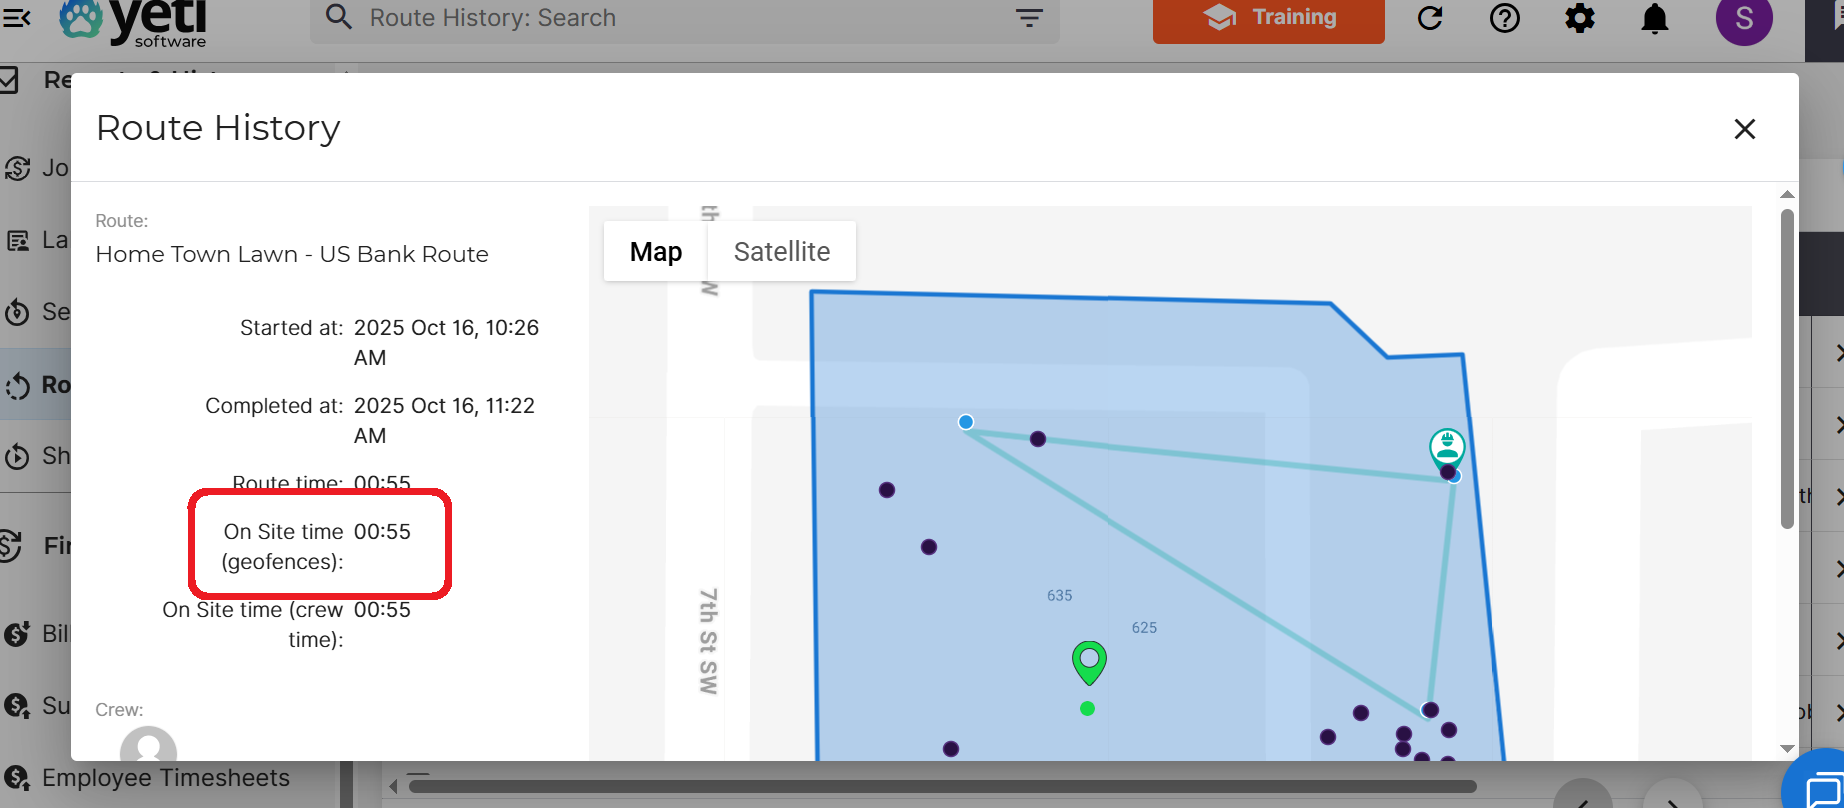
Route History Record
The Route History Report provides detailed information about the routes that have been performed. This is where you will find your geo-fence information about route and site that where performed in the past.
Tips
-
Use a clear and complete map image for best accuracy.
-
Keep your geo-fence as close as possible to the real site boundaries.