Table of Contents:
- Service Page
- Create a Service
- Edit your Service
- Assigning Services to Sites
- Consuambles required for services
- Equipment Required for Services
- Bulk Update Service Visibility
- Archiving Services
- View Service Data
- Service Column in Reports
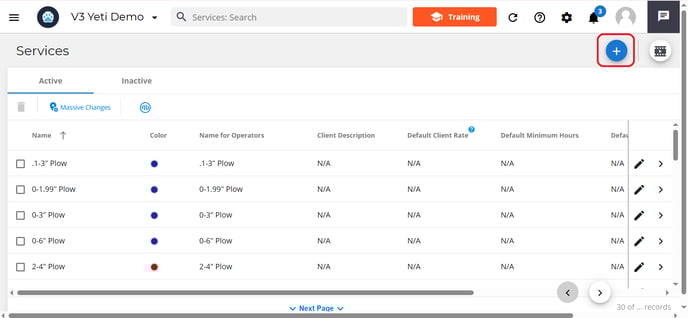
Service Page
To get to the service page, select Service in the naviagtion bar.

Create a Service
Click the blue (+) button to add a new service.
Name your Service
Give your service a name. This is how it will appear in reports.

Name for Operator
State how you want this service to appear for operators on the mobile app.
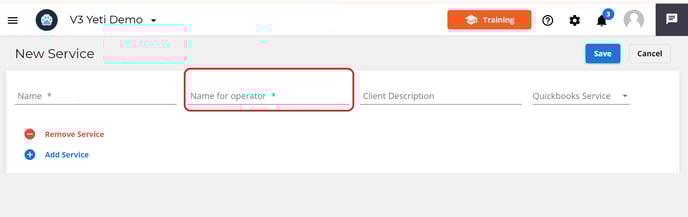
Client Description
You have the option to list how you want this service to appear in report that you want to send to your clients.

Services and QuickBooks
Choose to either sync your service with an existing item in QuickBooks or select "Create this item in QuickBooks" from the dropdown menu. This ensures your records stay accurate and supports smooth integration between Yeti and QuickBooks.

Edit your Service
Now that you've set the name of your service you can update it with information. Click the pencil icon beside the service you just created. This will bring you to the update service page, which will contain four tabs.

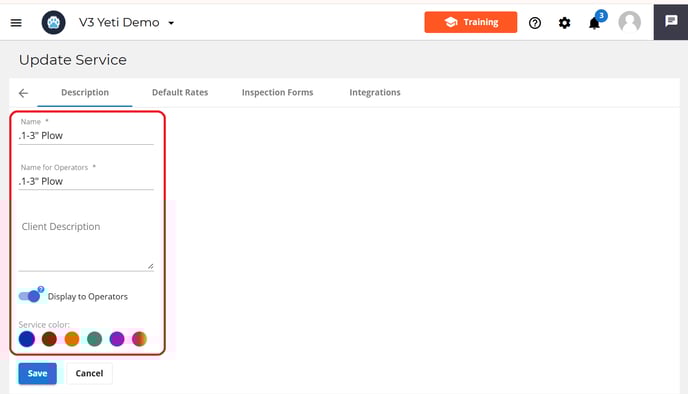
Description Tab
In this tab, you can set the following:
- Name: Ability to edit or update the name o a service you created
- Name for operator: Ability to edit or update the service name, which will appear on the mobile app for the operator to select
- Client Description: Ability to edit or update how the service name will appear to the client
- Display to operator: turn the toggle on to make this service is available for selection in the mobile app.
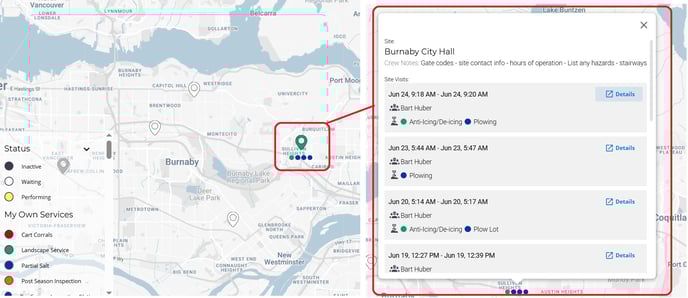
- Color: Set a color for this service. Color can be used to help visually identify services in records, reports, and on the global map.
Here are examples of how color is used to help visually find services on the map.
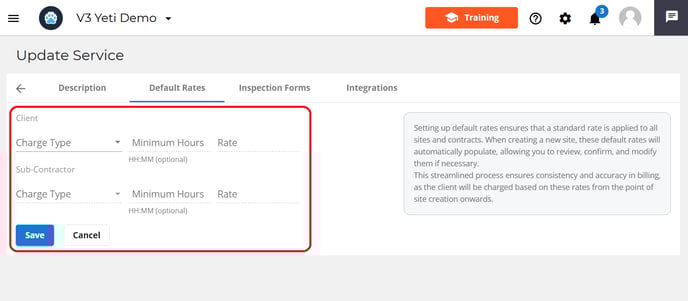
Default Rates Tab
When setting a rate for a service you can:
- Set 'custom' charge type, minimums and rates at the site level or use the Massive Change function.
- Set 'defaults' via the Default Rate tab.
When creating a new site, the default rates will automatically populate, allowing you to review, confirm, and modify them if necessary.
Example: You’d like to see a Pre-Season Inspection Service on every site at $0
You can set the following in the Default Rate Tab:
- Charge type: There is an option of Per Visit, Service (Hourly), Equipment (Hourly), and Monthly
- Minimum Hours: Specify the minimum time required for the service.
- Rates: Set how much you want to charge for this service.
Important Note: A charge type and rate must be set for the service. If not, the service will not appear on the mobile app for selection. If you want the Service to be available, but do not want to set a charge, you can set the rate to zero ($0).
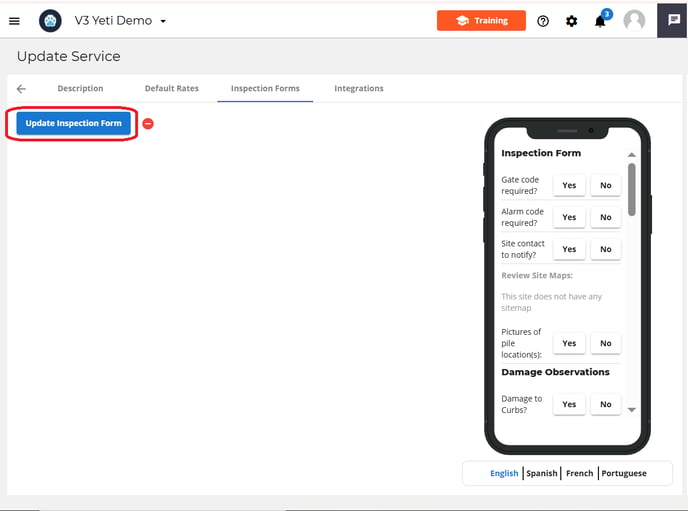
Inspection Form Tab
In this tab, you can set the following:
- Turn your service into an inspection form.
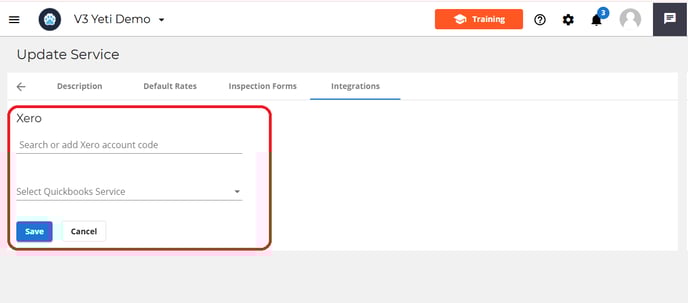
Integration Tab
In this tab, you can set the following:
- Connect your Yeti to Xero.
- Connect your Yeti to QuickBooks online.
*Please note there is a separate save button on each tab. Please make sure that any tab with new information has been saved before leaving the page.
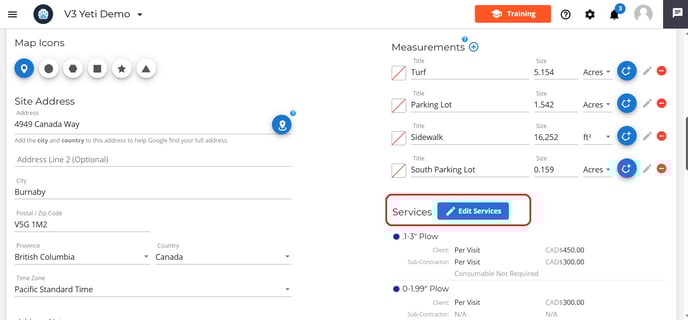
Assigning Services to Sites
Once you have finished editing the service, you will need to add it to your sites.
To do this, go to the Site page and either:
-
Update each site individually. Learn more here
-
Use the massive change feature to bulk add the service to multiple sites at once. Learn more here
If you do not do this step, then the service will not be an option to select on the mobile app.
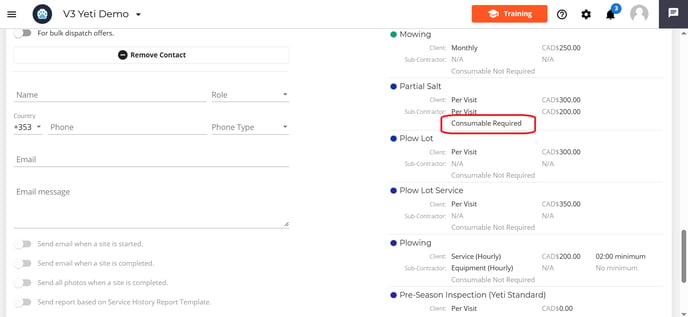
Consuambles required for services
You can set the consumable requirements for certain Services. This mean that This option is not available for the Service "Pre-Season Inspection (Yeti Standard)".
You can set this by editing your Site. In the Services section, select the charge type to see the toggle and click on "Save".

Check the information and click "Save" again. Consumable required will now be listed underneath the service rates.
In the mobile app, the Operator can see which Services require consumables. They must enter what consumable they used to complete the service or else an alert will appear if the Operator attempt to "End Site" without the consumable information.

Equipment Required for Services
You can require operators to select the equipment they used when choosing a service in the mobile app.
To do this, you will need to set the charge type for the service as Service (Hourly).

When a service shows “Equipment Required”, it means selecting a piece of equipment is mandatory. This is important because the equipment usage time is used for billing calculations. Learn more here.

You can use the massive change feature on the service page to change the Display to Operator Setting for multiple service at once.
Select the services you want to update and select the massive change button.

Select the service button on the pop-up.

Turn the dispaly to operator toggle on and click save.

Archiving Services
When a service is no longer being provided, you can archive it. This will remove the service from the active list and put it in the inactive list.
To archive an item, first select the service , then select the bin icon.

If you need to retrieve it again, head over to the inactive tab, select the service and then select the bin icon.

View Service Data
Services are tracked and used across multiple reports in the Yeti web app to support accurate monitoring, billing, and cost analysis. You’ll find service data integrated into five key pages: Dispatch Page, Service History Report, Billing Report, Sub-Contract Report, and Job Costing Report. Click on a record to open it up.
- Dispatch record

- Service History Report


Service column in Reports
If you want service information to be visible on a report page, you must turn the correct fields on in the column configuration settings. Select the column configuration found at the top of the page.

Head down the list until you find the service field. Turn the eye icon blue to make it visible. Next to each field, there’s a number input field. This number determines the order the columns appear on the report page.
For example:
- A column with order "1" appears first.
- A column with order "2" appears second, and so on.

Service Column in Reports
Different reports have different equipment options.
- Service History Report:
- Services
- Service Duration
- Service Duration Decima
- Billing Report:
- Services
- Services Rate
- Sub-Contractor Report:
- Services
- Services Rate
- Job Costing Report:
- Services
- Services Rate
Exporting Service Information
When exporting records as a spreadsheet, make sure the correct service fields are turned on in the Column Configuration settings, and that the columns are arranged in the order you prefer.
The exported spreadsheet will match the visibility and order of the columns as they appear on the report page.

If you are running into any issue, please email support@yetisoftware.com.