When you add a subcontractor to your Yeti account, the system automatically generates a unique contract for that subcontractor. This contract outlines the agreed-upon Sites, Equipment, and Consumable rates for the work they’ll be performing.
Each contract is tailored to a specific subcontractor and cannot be duplicated or reused for others. This ensures that the details and rates remain accurate and specific to each working relationship.
Table of Contents:
- Creating a Sub-Contractor Contract
-
How to check if a company is on Yeti?
- Create a contract with a company that's not on Yeti
- Contract breakdown
- Archive a Sub-Contractor
- Unarchive a Sub-Contractor
Access the Sub-Contractor Page.
To access the sub-contractor page, select the subcontractor button in the navigation bar. This is where you sub-contractor contract will be listed.

Creating a Sub-Contractor Contract
You can create a contract with:
1) A company who does not currently use Yeti either as a Subscriber or as a Sponsored company.
When you create a contract with a company that does not currently use Yeti, then
that company will be given a sponsored Yeti environment to work from. Learn more
about sponsored companies here.
2) A company that currently uses Yeti and has a Company Code.
- As an existing Sponsored Company (sponsored by another Contractor
who uses Yeti) - As a current Subscriber themselves
- When you create a contract with a company with no subscription, then that company will be given a sponsored Yeti environment to work from.
When you create a contract with a company with a subscription, a sponsored Yeti environment is not created. This is because this company has its own Yeti environment to work from which you cannot access.
How to check if a company is on Yeti?
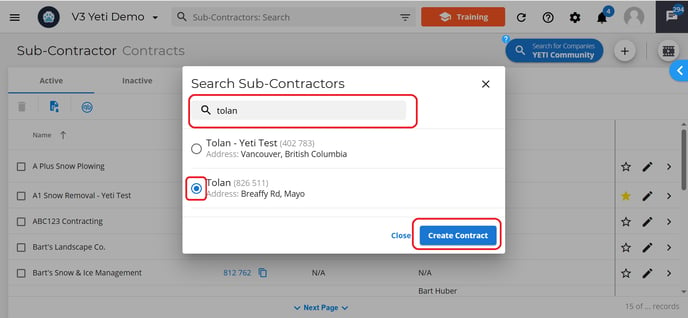
You can use the Yeti community to see if a company is already on Yeti. Click on the blue button that says Yeti Community.

Enter the company name or, for accuracy use their company code. Once you have found the correct company, click the Create Contract button.
Once the subcontractor contract is created, their company becomes a ‘sponsored company’. This establishes an interrelationship that enables information to be shared, completed, and billed between you and your subcontractor.
The contract can be managed by editing the rates and adding users to the sponsored Subcontractor company. You will gain the ability to switch environments to see the Subcontractor’s sponsored company.
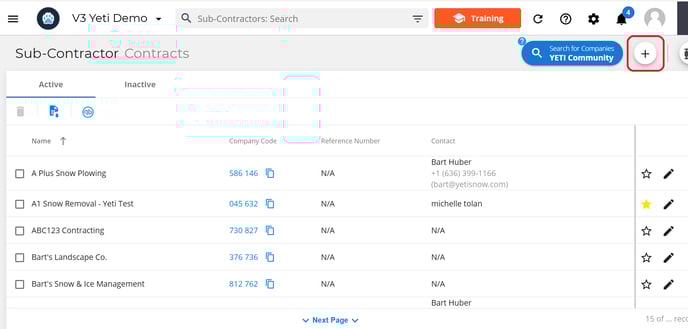
Create a contract with a company that's not on Yeti
Yeti still allow you to create a contract with a company that isn't on Yeti.
Head over to the subcontractor page and click the plus (+) button
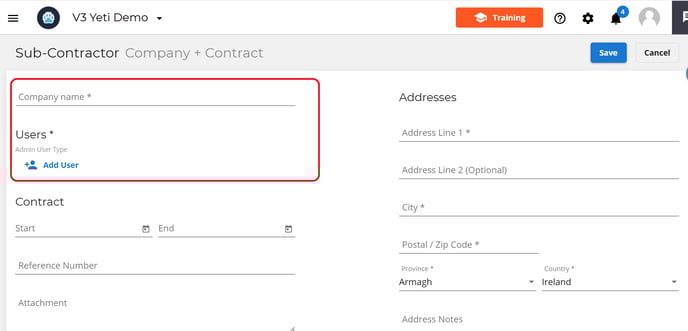
Contract breakdown
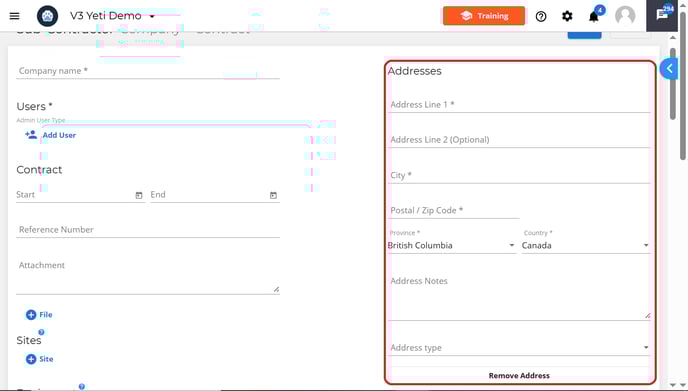
Contracts are broken down into a number of different sections. Some sections are mandatory to fill out while others are optional.
Mandatory Fields
- Company Name
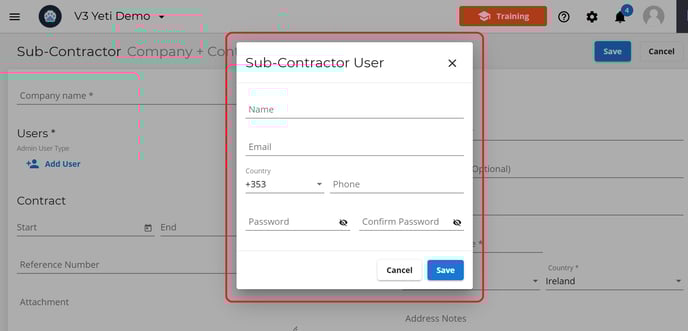
- Admin User
When adding an Admin User you are required to list their Name, Email, Phone and Password. Click save when done.
All other fields found in the contract are optional. This includes consumables and equipment rates, contact details, and other information.
For accurate reporting and records, we advise you to fill out the rate fields.
Adding Sites
To add sites to a contract, click the (+) Site button.

A pop-up window will appear where you can choose the sites you want to add. If you’d like to search by client or route you can do so by switching over to one of the following tabs.

Once you’ve made your selections, click Done to confirm.

Setting Rates in Contract
When creating a Subcontractor Contract, it’s important to define the equipment and consumable rates that will apply. If you do not specify custom rates in the contract, the system will automatically use the default rates instead.
Please note: Only the items listed in the Subcontractor Contract will be available to Operators in the mobile app. If a consumable or piece of equipment is not included in the contract, it cannot be selected during a shift.
[Learn more about Setting Rates here.]
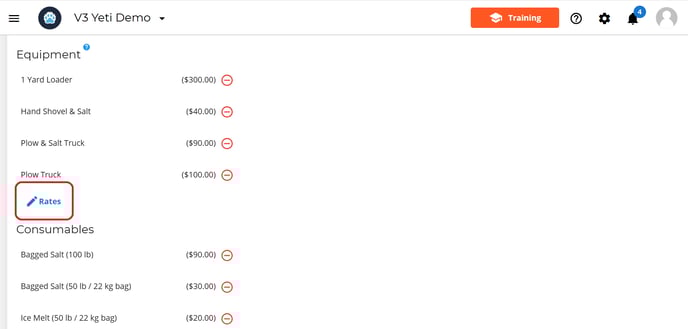
Equipment Rates
In the Equipment section of the contract, you will see a list of equipment. These are equipment whose Sub-Contractor Rate in Category Rates have been filled out. You can find Category Rates on the Equipment page.
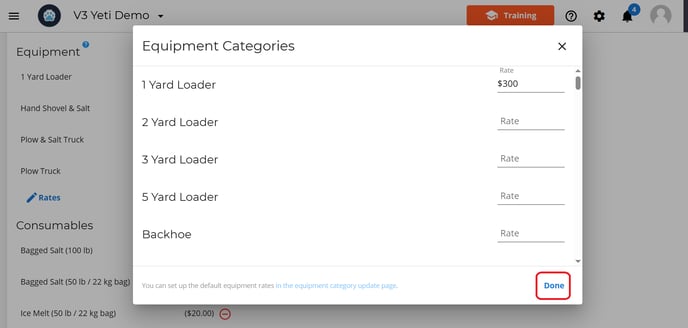
If you want to set custom rates for equipment, click the rate button.
Add the correct figure beside any piece of equipment you want listed in this Subcontractor's contract. If you do not wish to charge for the use of equipment enter in figure 0. Once you are finished click the done button.
If you want to remove a piece of equipment, select the red circle icon beside it.
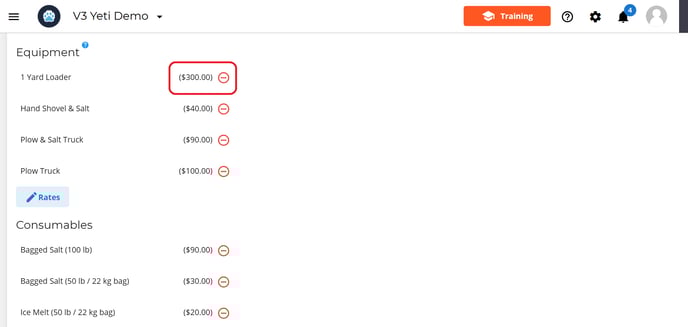
Any piece of equipment that is not listed in the subcontractor contract will be hidden from the mobile app when operators are servicing sites.
Consumables Rates
In the Consumables section of the contract, you will see a list of Consumables . These are Consumables that have their default rates set on the consumable page.
To set your own custom rates for this subcontractor, click the rate button.
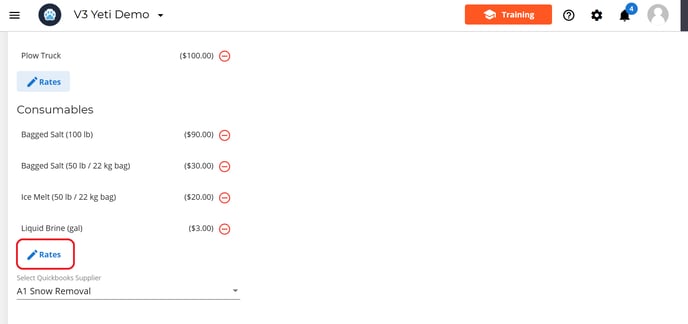

If you want to remove a consumable, select the red circle icon that is beside it.
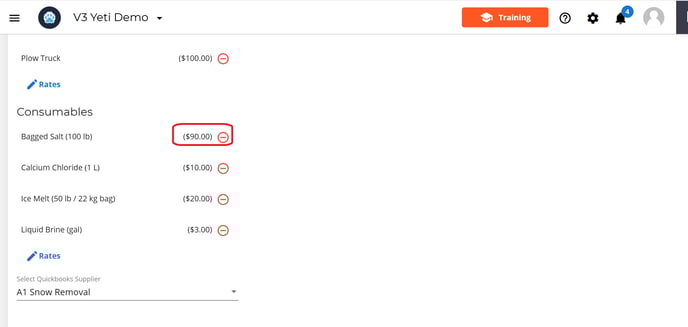
Any consumables that is not listed in the sub-contractor contract will be hidden from the mobile app when operators are servicing sites.
Why There’s No Service Section in the Contract
You may notice that there is no section for Services in the contract. That’s because service rates are set at the Site level, not within the contract itself.
This allows you to assign unique service rates for each individual Site, rather than applying a single rate across an entire contract. It gives you more flexibility and precision in your pricing structure.
[Learn more about setting service rates in Site settings.]
Billing Address
Please note the Sub-Contractor billing address in this field.
Contact Info
Please provide the name and phone number of the primary contact for this Subcontractor Contract. This information is for reference only.
If you want this contact to receive automated updates when a site is being performed on, you’ll need to enable notifications in the individual Site settings.
[Learn more here.]

Sub-Contractors and QuickBooks
The QuickBooks field gives you two options:
-
Sync with an existing Sub-Contractors in QuickBooks
-
Create a new Sub-Contractors in QuickBooks by selecting "Create this Sub-Contractors in QuickBooks" from the dropdown menu

Once you make your selection and save the contract, QuickBooks Online will be automatically updated.

Bulk Sync Sub-Contractors with QuickBooks
To bulk sync your Sub-Contractors with clients in QuickBooks head over to the Sub-Contractors page and select the QuickBooks Button.

A pop-up will appear with a list of your Yeti Sub-Contractors on the left side. Beside each yeti Sub-Contractors there is a link icon and a QuickBooks dropdown menu.

QuickBooks Link
The QuickBooks Link is available in 3 colours:
- Green: The green link means that the Yeti client has been successfully synced with the QuickBook Sub-Contractors .

- Blue: The blue link means that a match has been found but has not been synced yet. To sync this match, select the save button.

- Red: The red link means that no match has been found and that you need to make the association by selecting the dropdown menu. When you find the correct match, select the save button.

Hit the save button and your QuickBooks Online will be updated.
Archiving a Sub-Contractor
If you're no longer working with a subcontractor, you can archive their contract to keep your records up to date.
To do this select the checkbox next to the subcontractor’s contract, and click the bin icon. A confirmation message will appear, select Yes to proceed. The contract will then be moved to the Inactive tab

Unarchive a Sub-Contractor
Head over to the inactive tab, select the checkbox next to the subcontractor’s contract, and click the bin icon. This will place the sub-contractor back into the active list.

If you are running into any issues, please reach out to support@yetisoftware.com.