Table of Contents:
- Download the Yeti App
- Set your Yeti App
- Use Yeti App
- Start the Shift
- Select the Onboarding Equipment
- Start the Route
- Start the Site
- Crew Lead
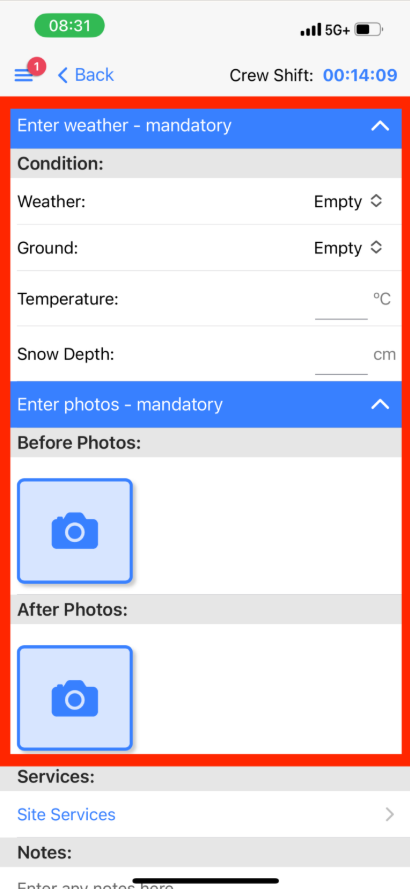
- Managing the weather and photos
- Selecting Services
- Equipment Used to Complete Service
- Consumables Used to Complete Service
- End Site
- End Route
- End Shift
- Optimize Your Tracking
- Switch Languages
- Set the Quality of your Photos
- Automatically Update Your Yeti App
Download the Yeti App
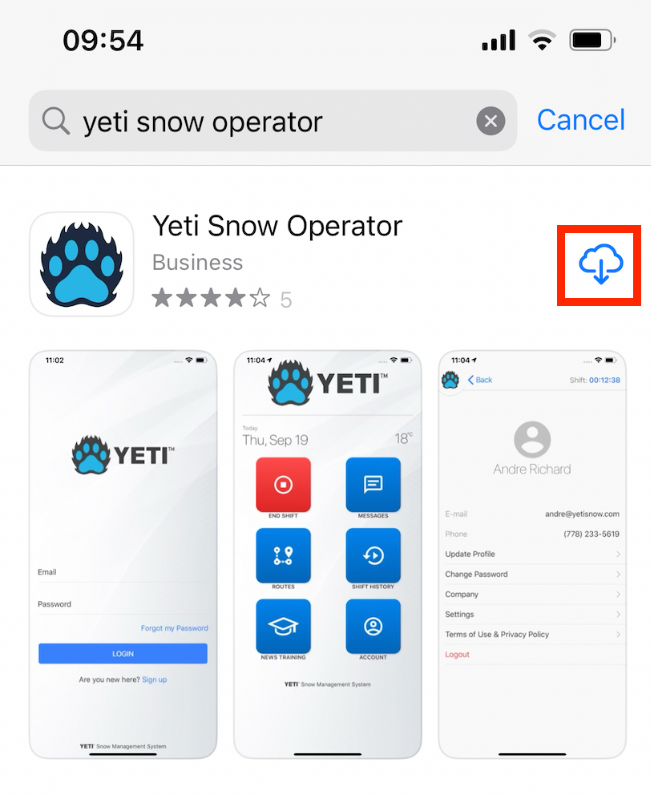
You can find it in Google Play Store or in Apple Store by searching "YETI Snow Operator".
Click to install the app
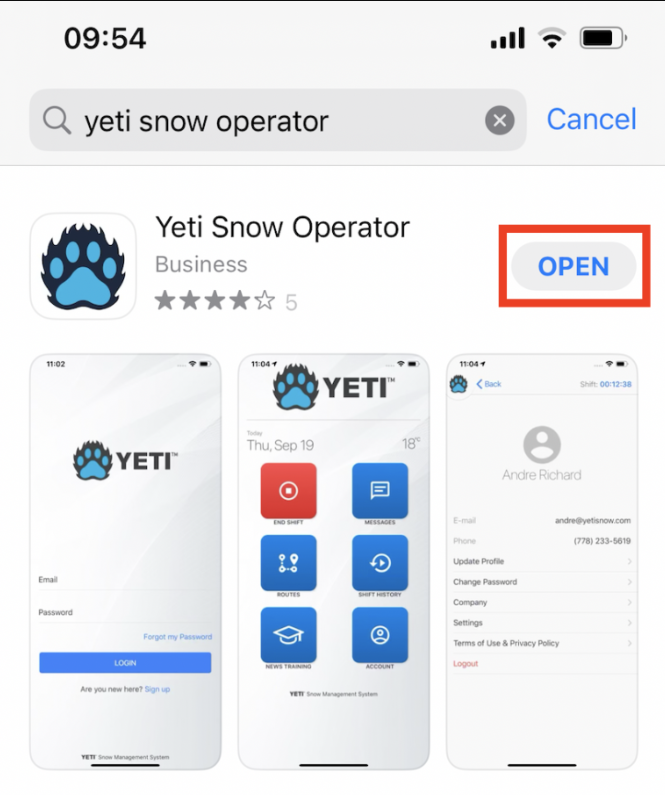
Click to open the app
If you are unable to download the app, check the instructions here.
2. Set your Yeti App
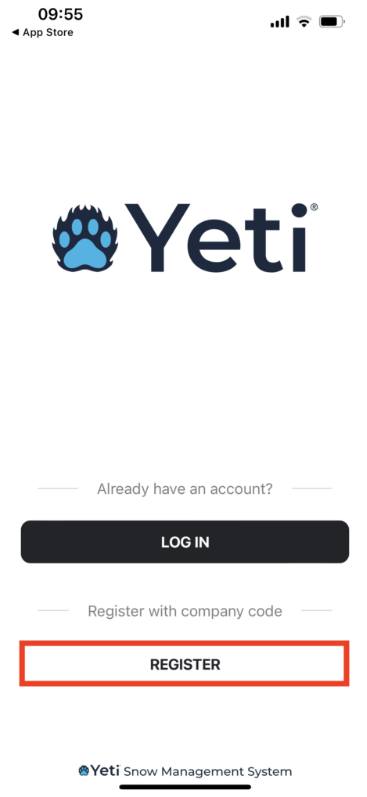
You can self-register as a user or log in if you had already registered in Yeti.
To self-register as a new user through the app, you need to provide the company code and the user's name, email, and password, or social login (Facebook, Google, LinkedIn).
Click on 'Register'
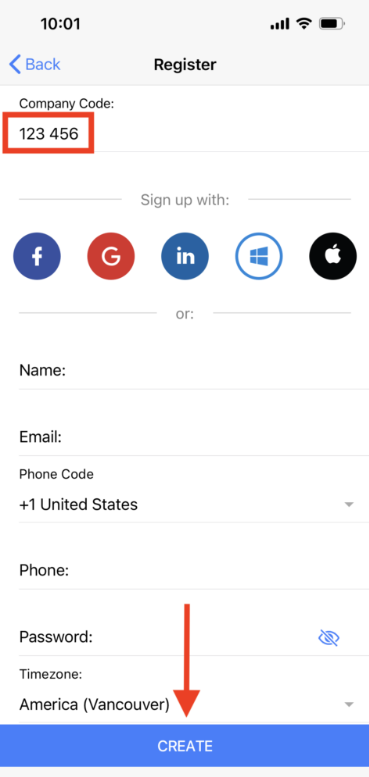
Insert the company code, fill in your information, and click on 'Create'.
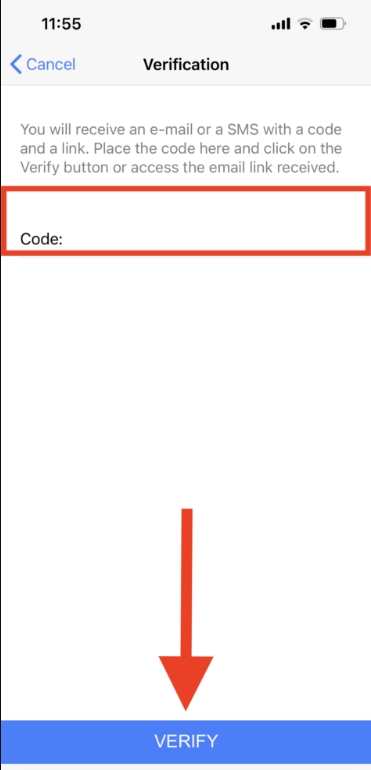
When you create a new user, you will receive a verification email with a code. Put this code in your mobile app, and click on 'Verify'.

Note: In order to use Yeti App, your company must accept your user account. You can log in on the Yeti app, but you cannot perform the Shift.
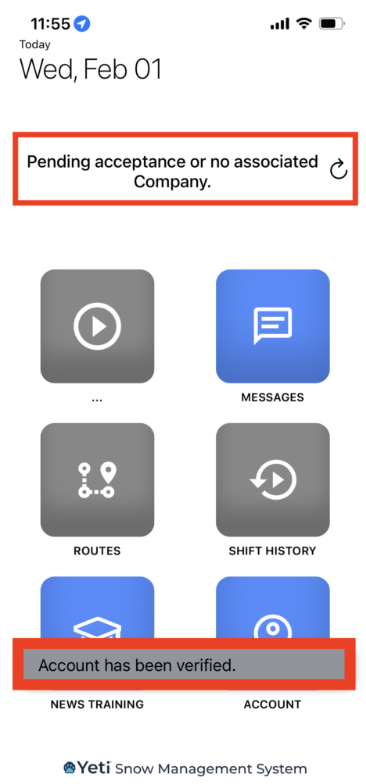
When you register as a user, your company will receive a notification to accept it.

3. Use Yeti App
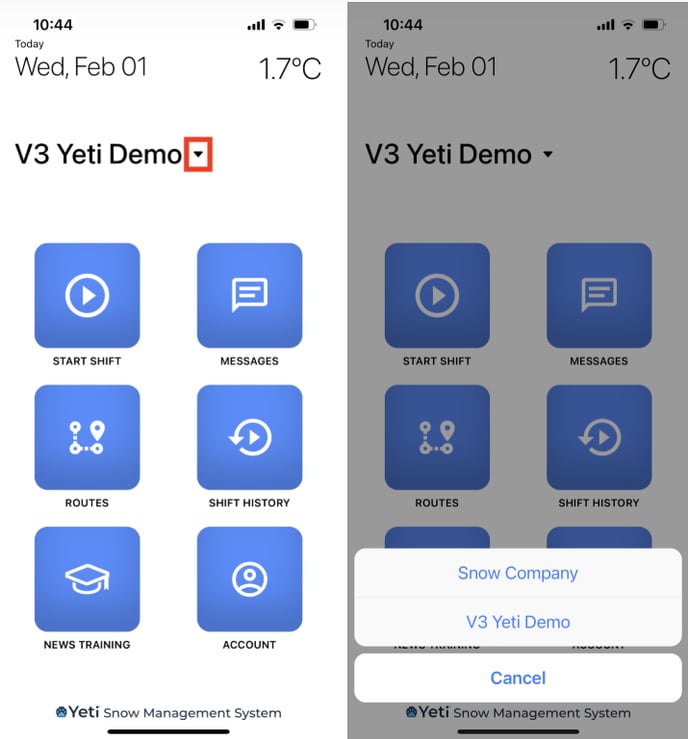
If you belong to more than one company, you can select which company you are working for.
Click on the arrow and choose the company.
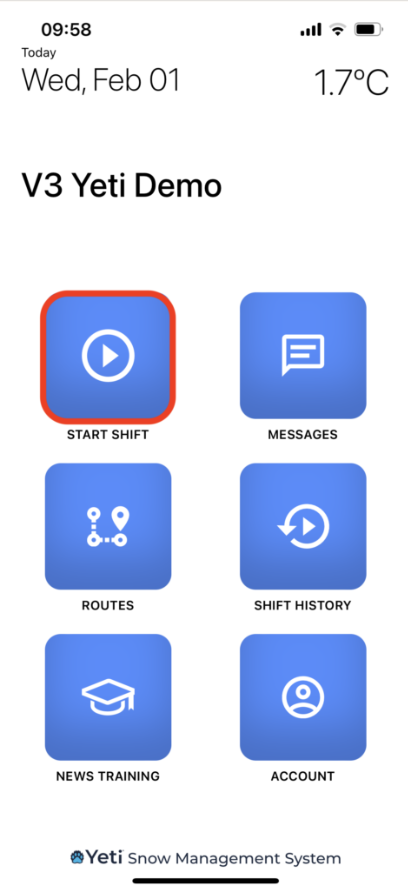
3.1 Start the Shift
Start your Shift by clicking on the button.
3.2 Select the Onboarding Equipment
The equipment that shows at the beginning of the Shift (onboard equipment) is like a checklist that will help the operator to start the job. This same equipment appears in the other Sites performed within that same Shift; however, they will no longer be loaded if Shift is ended.
When performing a Site, the operator chooses a Service, the equipment category, and the equipment. The operator has the flexibility to choose equipment that is not the same one selected at the beginning of the Shift, as the operator may have taken three pieces of equipment and used only one piece of equipment on the Site.
NOTE: Once a site has started, the operator will need to select the equipment they used.
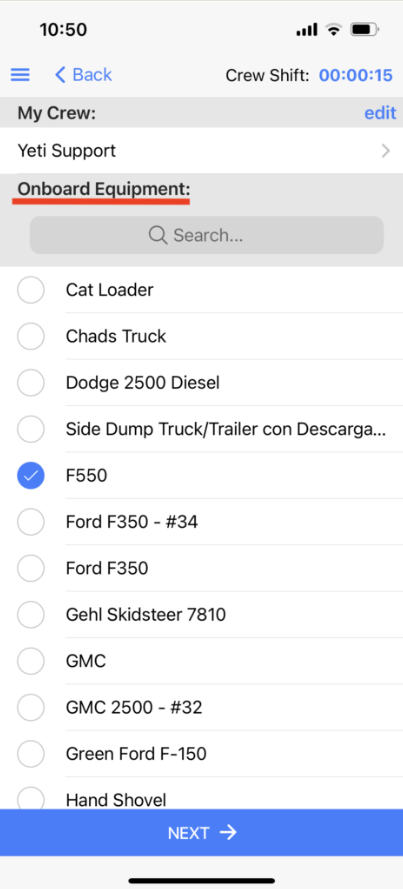
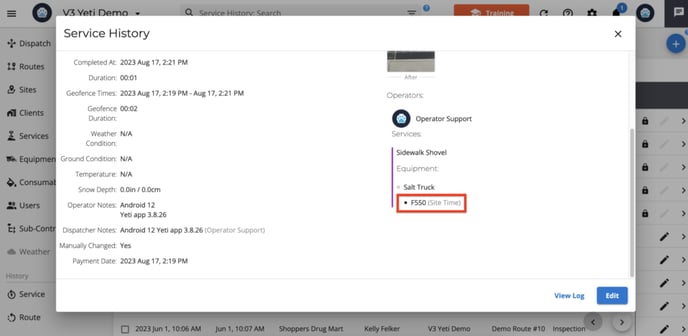
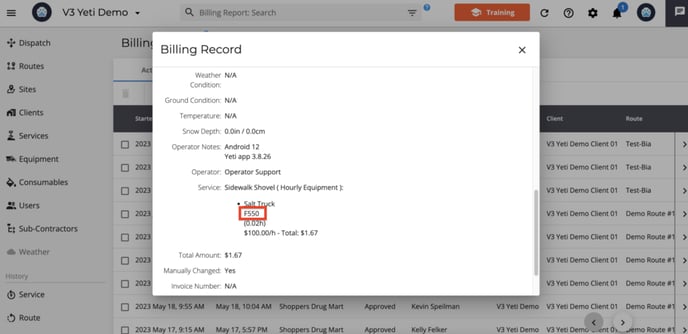
Note: Onboarding equipment can be seen in the reports.
3.3 Start the Route
Select the Route and click on 'Start Route'.
Once a user selects a Route, it will show a list of incomplete Sites. You can skip Sites or close if the user forgot to end the shift.
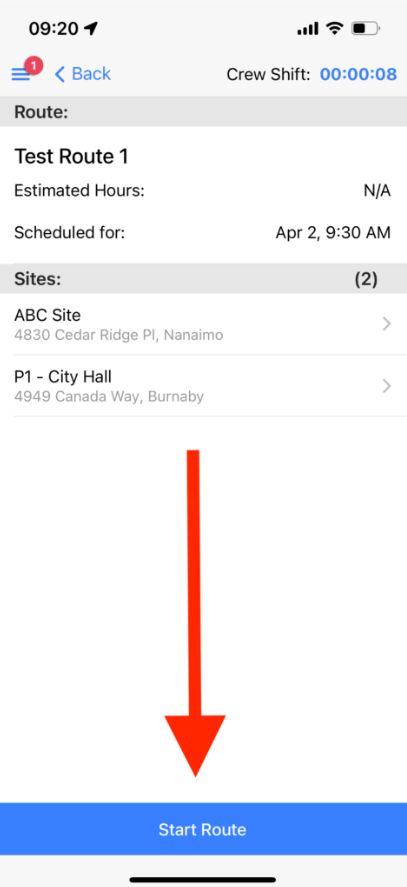
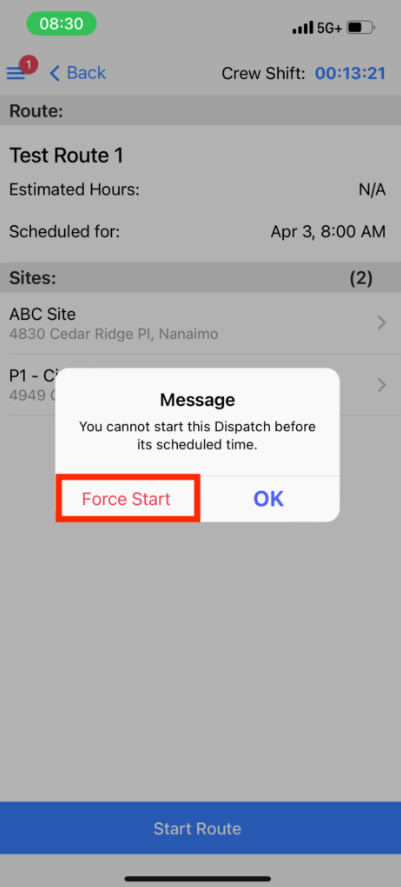
You can select a Dispatch Route that is scheduled for a future date. There is an option to click "Force Start".
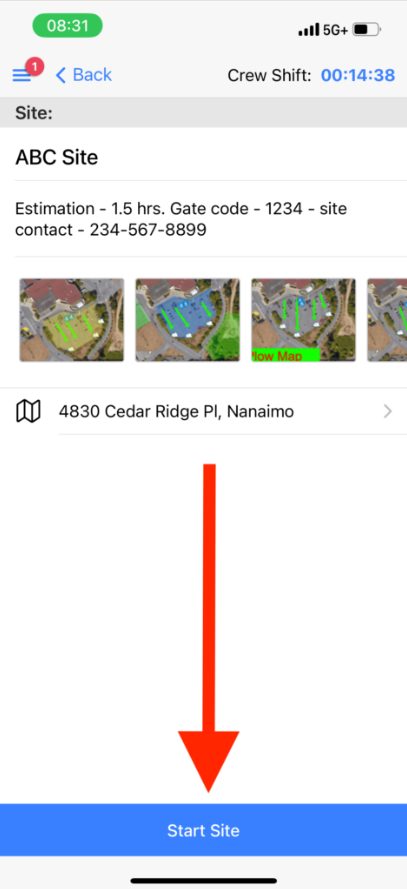
3.4 Start the Site
Select the Site and click on 'Start Site'.
Crew Lead
YETI includes a feature that allows one operator to act as the Crew Leader. The Crew Leader starts their shift and adds other operators to their crew. They can add or remove crew members at any time during the shift.
When an operator is removed from one crew, they can be added to another. This flexibility makes it easy to adjust crews throughout an event and helps you keep track of where each operator is assigned.
Note: You can leave it as is if you do not have a crew.
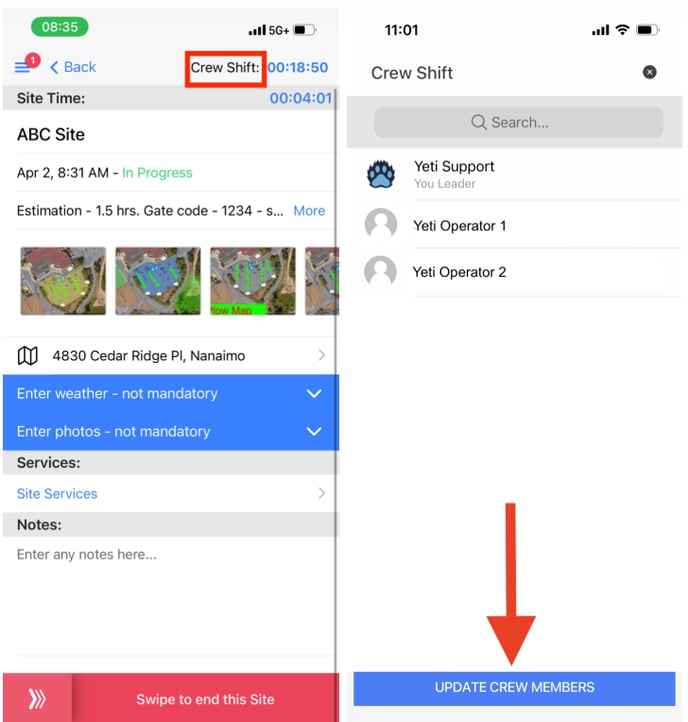
Important information: The other crew members are only allowed to take photos. Other information, such as weather, ground temperature, snow depth, and notes, can only be entered by the crew leader.
This is what the crew member sees:
This is what the crew leader sees
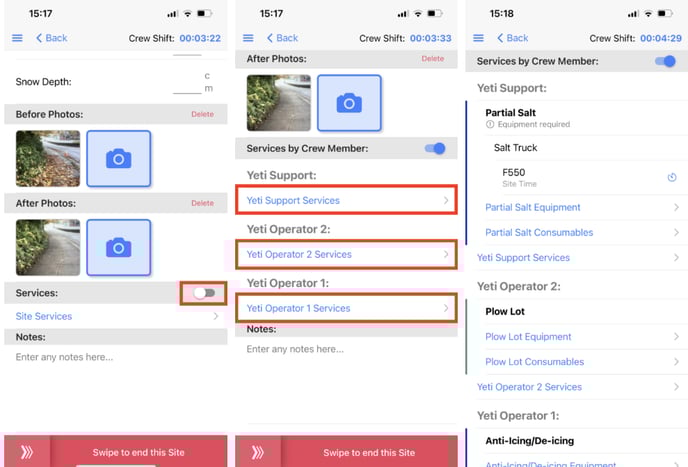
For each crew member, you can assign a specific service.
Click on the button beside the 'Services' and then select the Service for each operator.
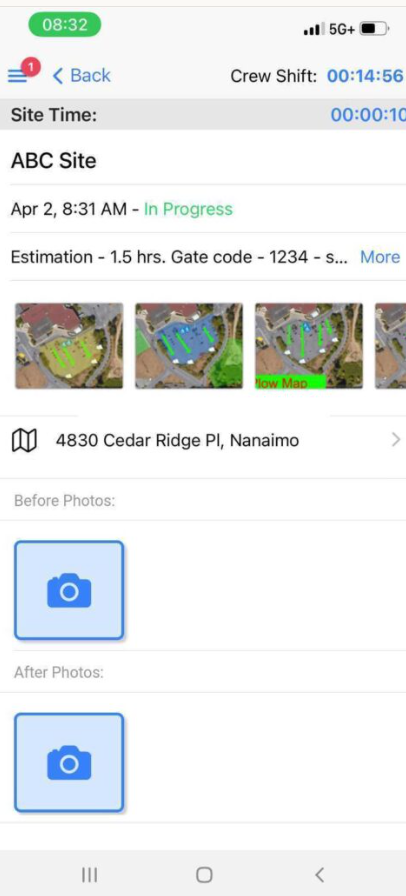
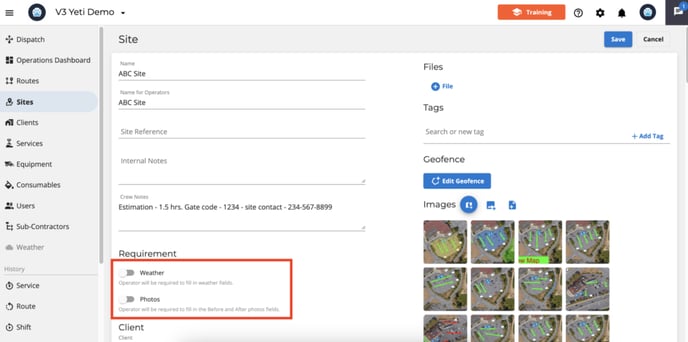
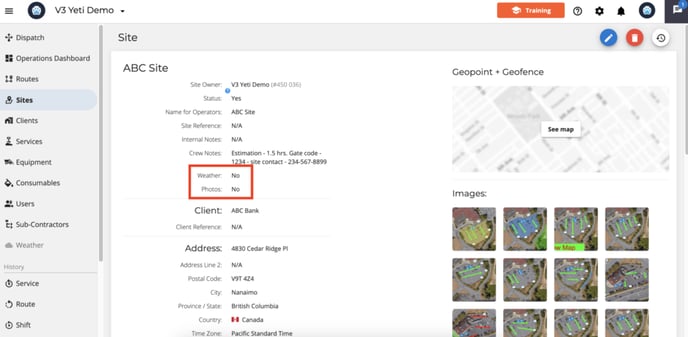
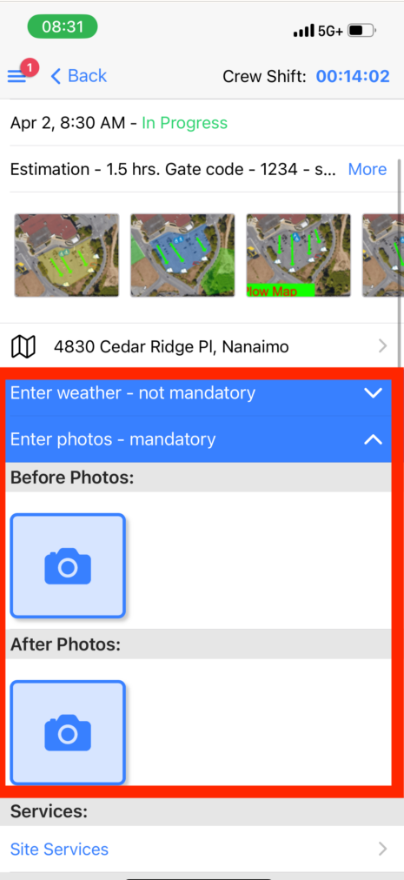
When creating or editing the Site, there is a toggle to enable or disable it.
If the photo is set to mandatory, will see an icon to take photos.
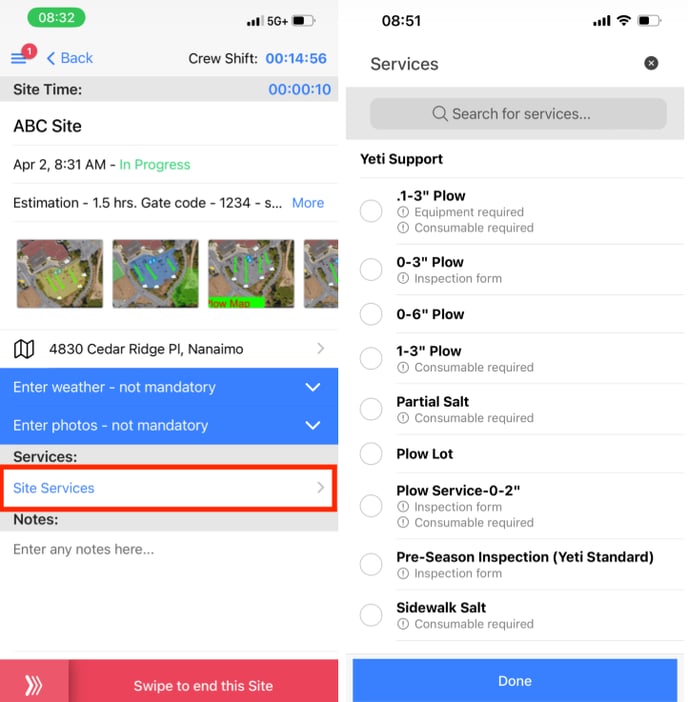
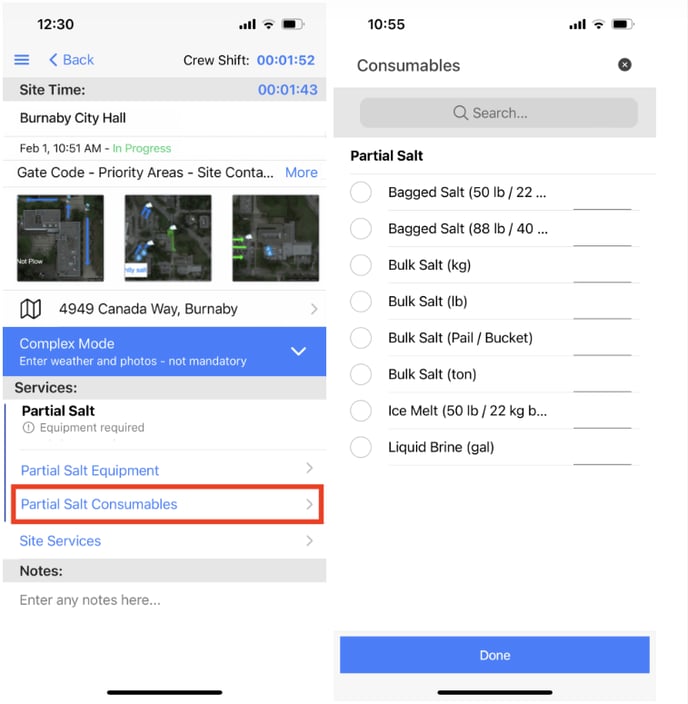
Click on 'Site Services' and select the Service that you are performing and click on 'Done'.
Service Duration
For services with an service hourly charge type, you can either:
-
Set the duration to a specific timeframe, or
-
Use the site’s default duration.
This value will be used in billing and costing reports.

Inspection Form
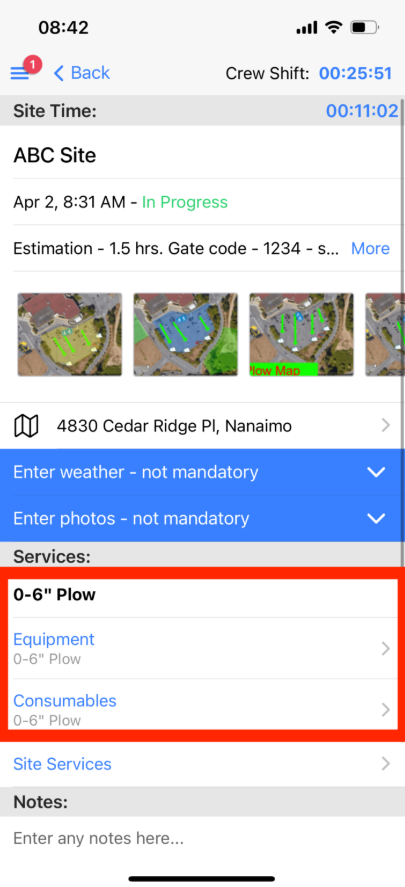
You cannot select Equipment and Consumables when choosing a Service with an Inspection Form. For all other Services—whether or not they require equipment or consumables—you will have the option to add them.
Here's what you see when you choose a Service with an Inspection Form:

Here's what you see when you choose a Service without an Inspection Form:
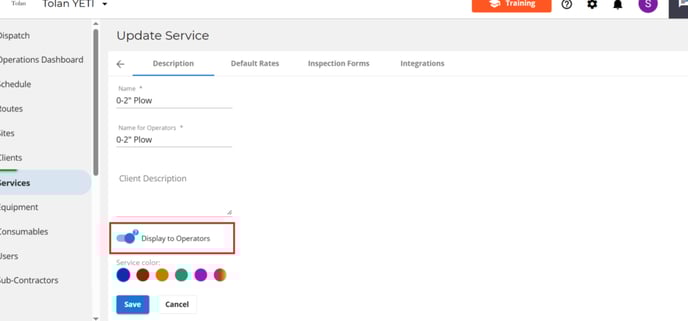
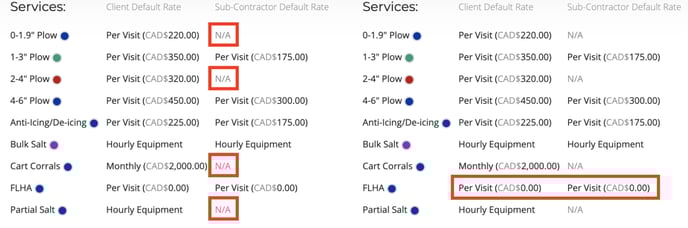
Service Visibility
There are two possible reasons why you cannot see Services in the mobile app:
1. The company has disabled the mobile app from showing the Service.
2. In the Service section of the site, no rate has been entered for this service.
-
Client rates must be entered for your operators to see the service.
-
Sub-contractor rates must be entered for sub-contractor operators to see the service.
If you do not wish to charge a rate, you can set it to 0.
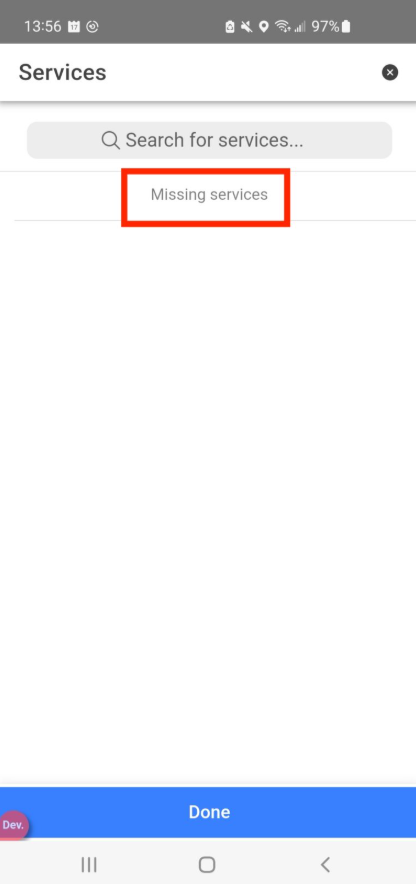
The message below will appear if the company did not register any Services.
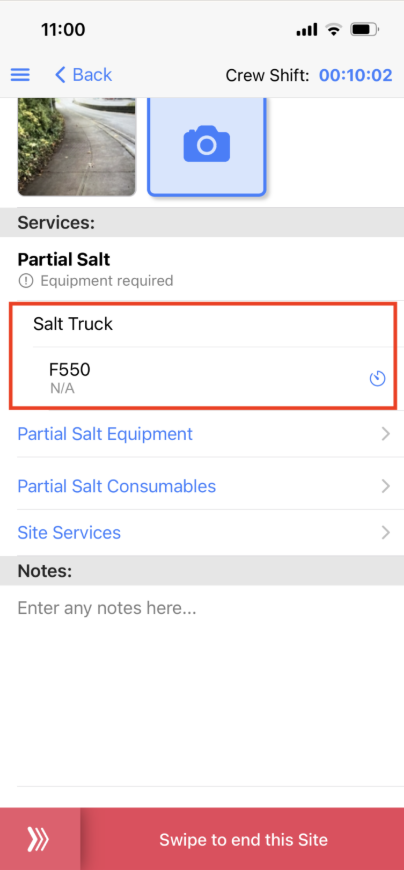
If the onboard equipment was not selected, you need to select it.
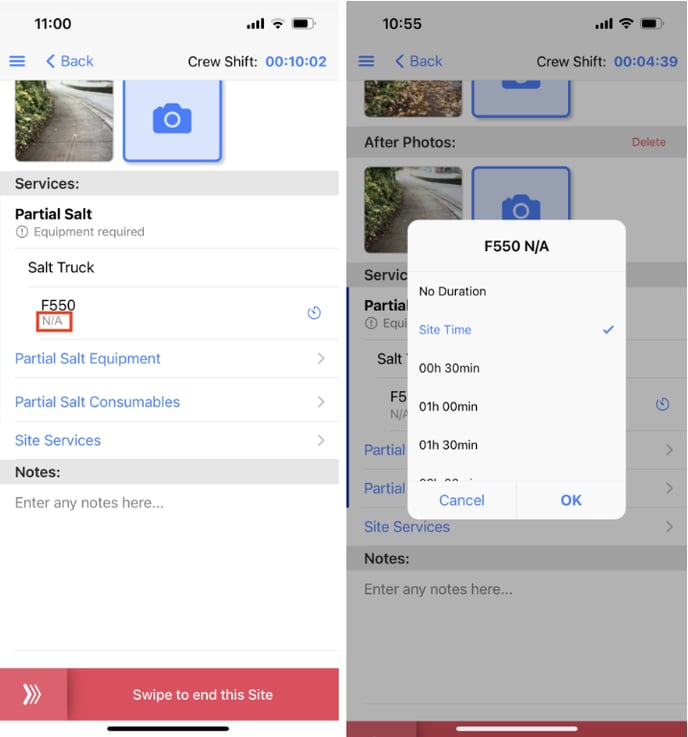
In the case that the Service you selected is an hourly fee, you will need to select the time for this Equipment. Click on 'N/A' and enter the time or select 'Set time' if you want the system to calculate the time based on the time you will spend on the Site.
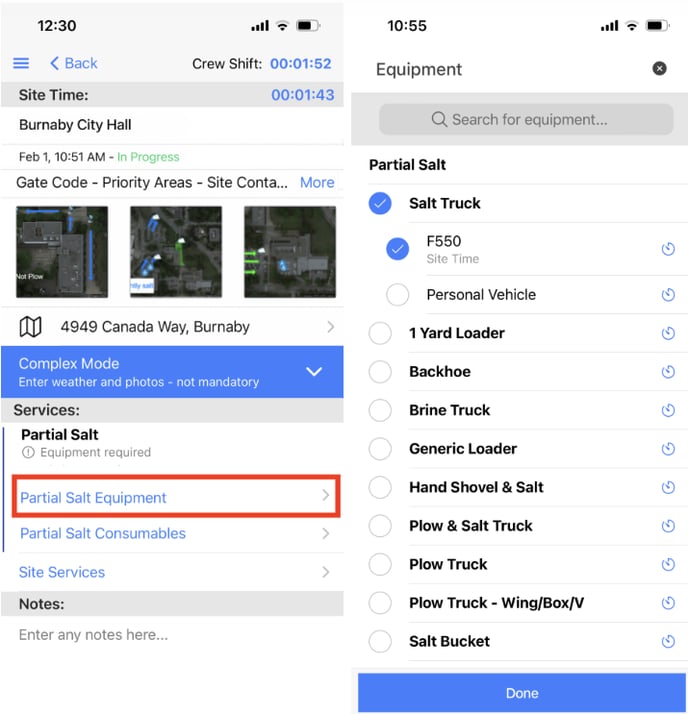
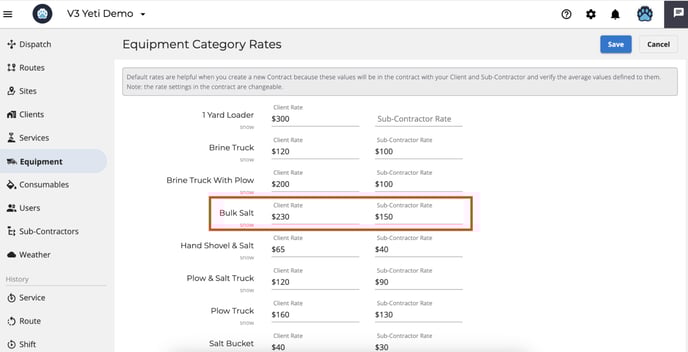
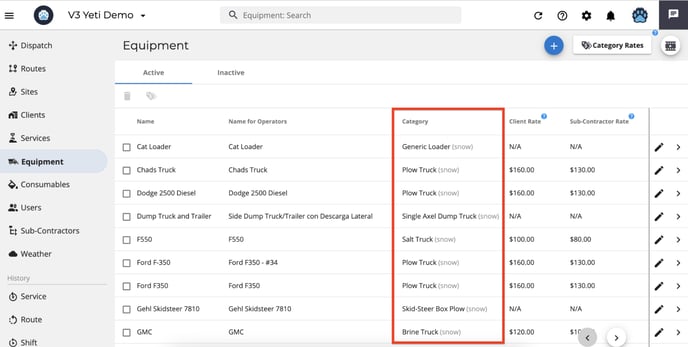
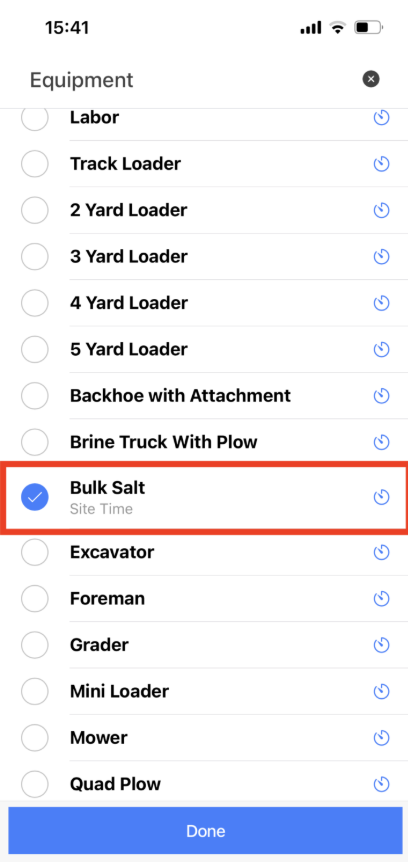
If you cannot see any equipment in the category, you have not created any. For example, you may not have set any equipment for the 'Bulk Salt' category but have set the rate. When you select the Bulk Salt category in the mobile app, no Equipment option appears.
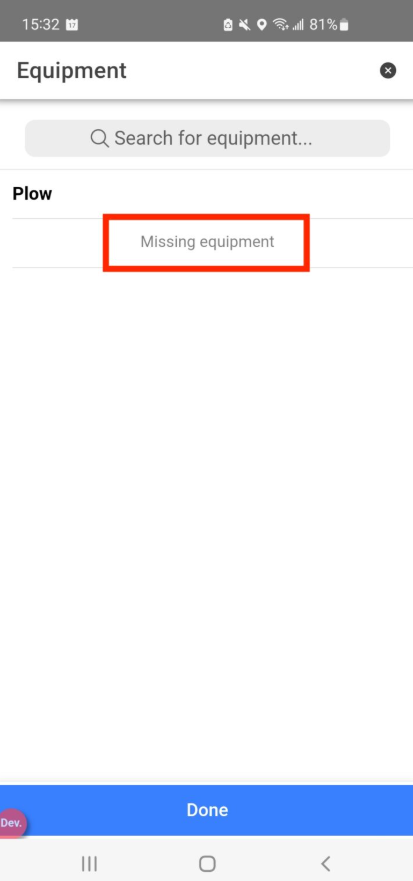
The message below will appear if the company did not register any piece of Equipment.
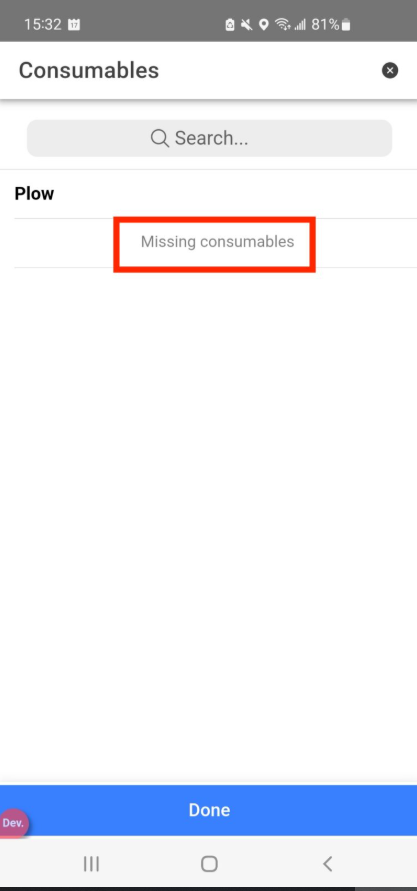
The message below will appear if the company did not register any Consumables.
Site Duration and Service duration

3.5 End Site
Now, you have completed your first Site. You can continue this Route starting the other Site, or you can start another Route in the same Shift if necessary.
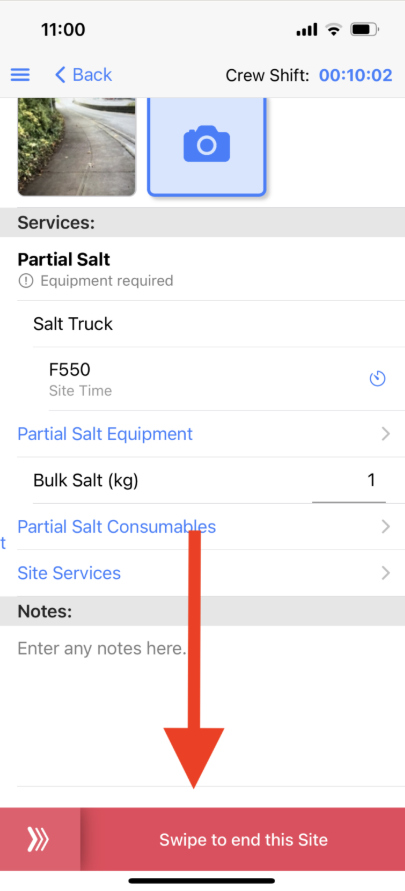
When you finish your Site, slide the button 'End Site'.
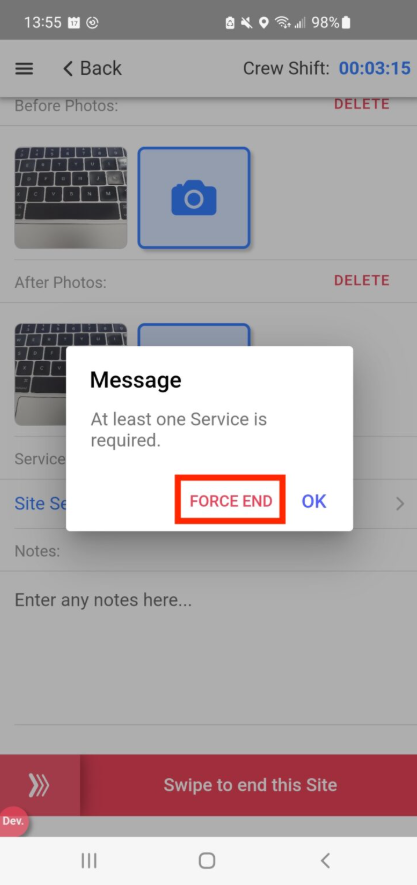
When you try to end a Site, but you have not selected any Service because it has not been registered by the company, you can click "Force End".
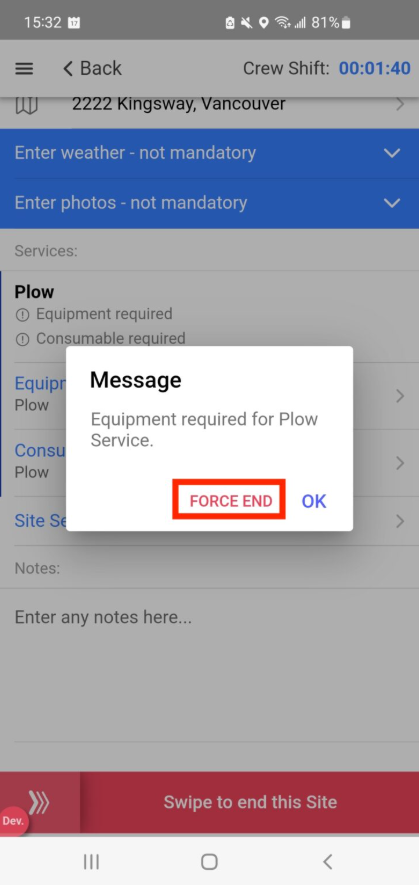
When you try to end a Site, but you have not selected any Equipment because it has not been registered by the company, you can click "Force End".
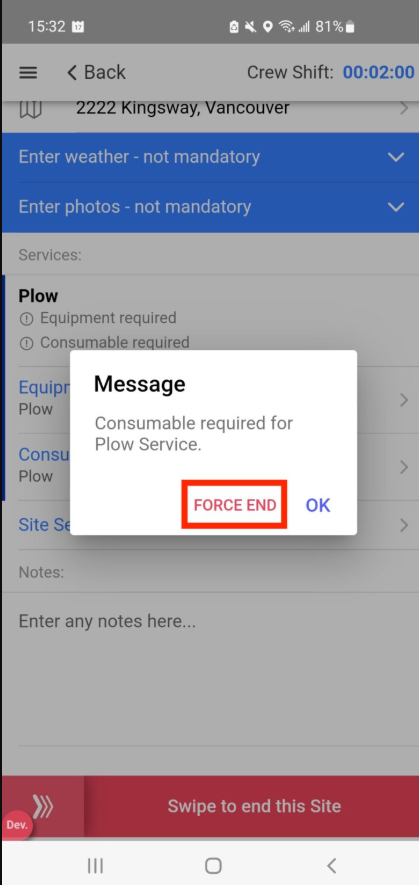
When you try to end a Site, but you have not selected any Consumables because it has not been registered by the company, you can click "Force End".
3.6 End Route
You can select another Site to perform or slide the button 'End Route'.
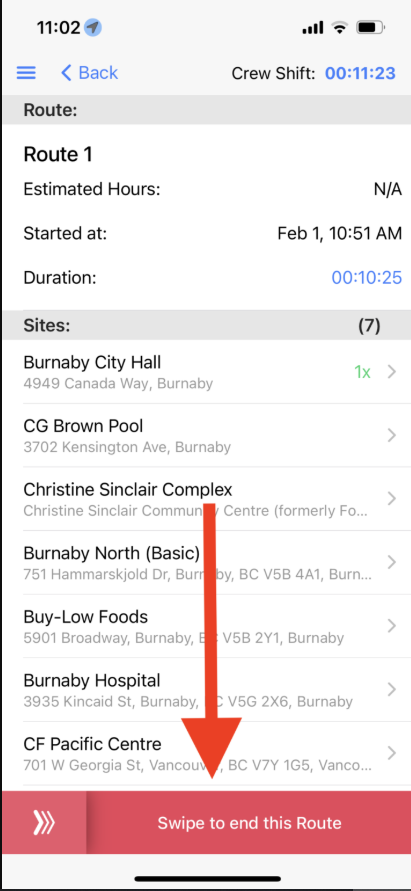
You will see the message below if you are performing a Dispatch Route that must be performed on all Sites that belong to this Route. However, you have the option to click on "Force End" to End the Route.
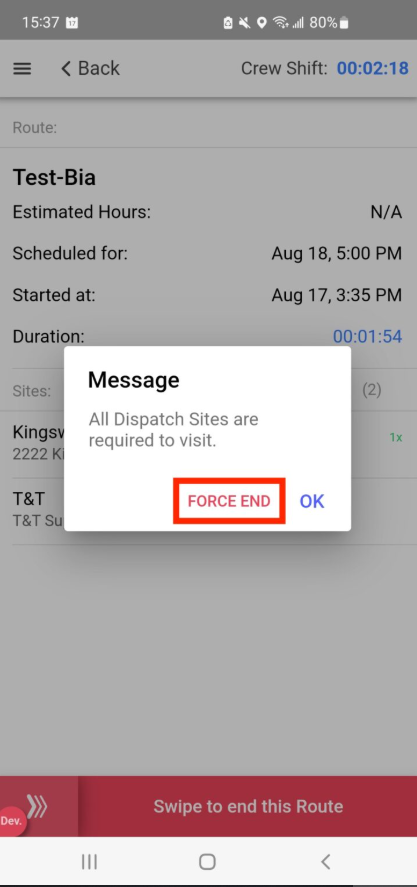
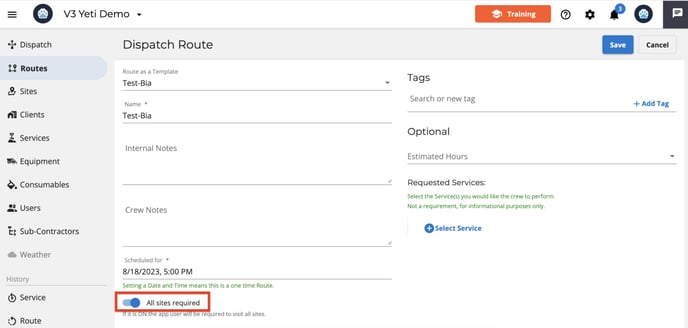
It is possible for the Company to make it mandatory for the Operator to perform all the Sites that belongs to the Route.
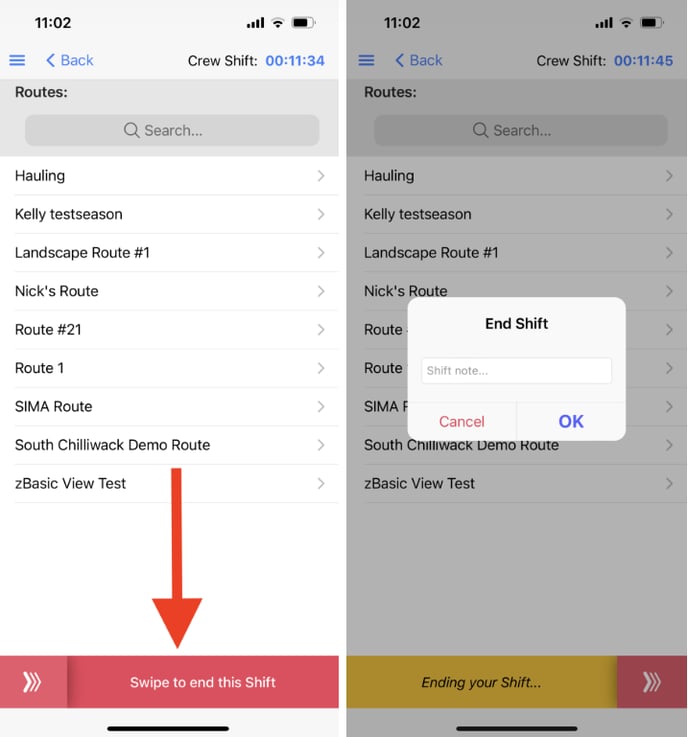
3.7 End Shift
You can select another Route to perform or slide the button 'End Shift' and add a note if you want.
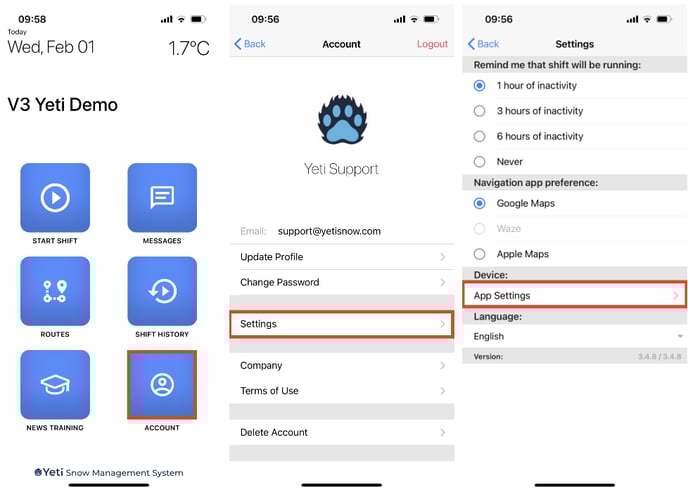
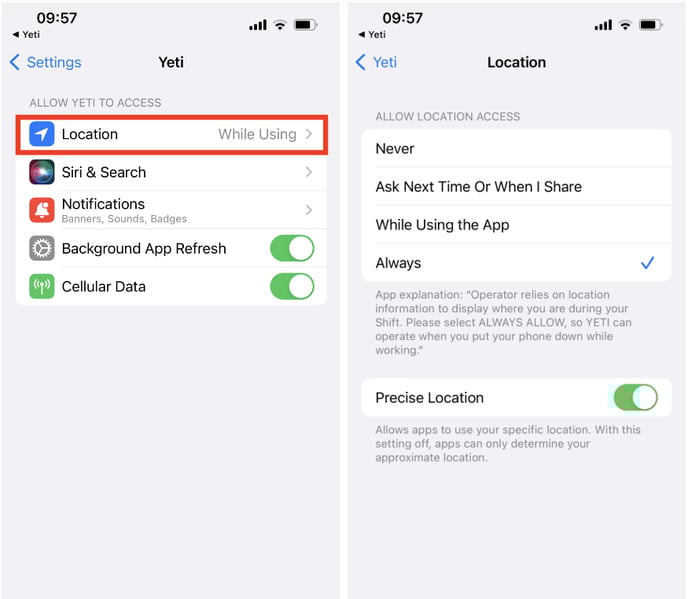
4. Optimize Your Tracking
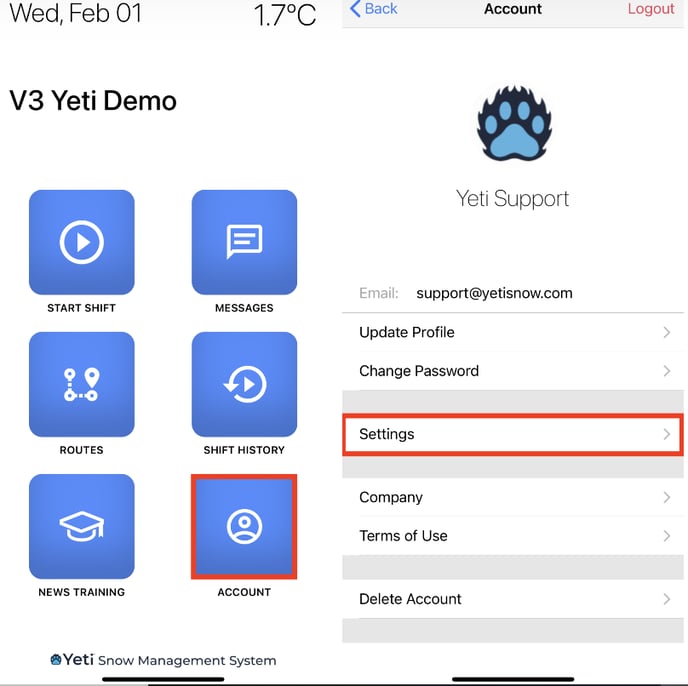
You need to allow the app to access your location. Click on 'Account' > 'Settings' > 'App Settings'.
Click on 'Location' and set as 'Always'.
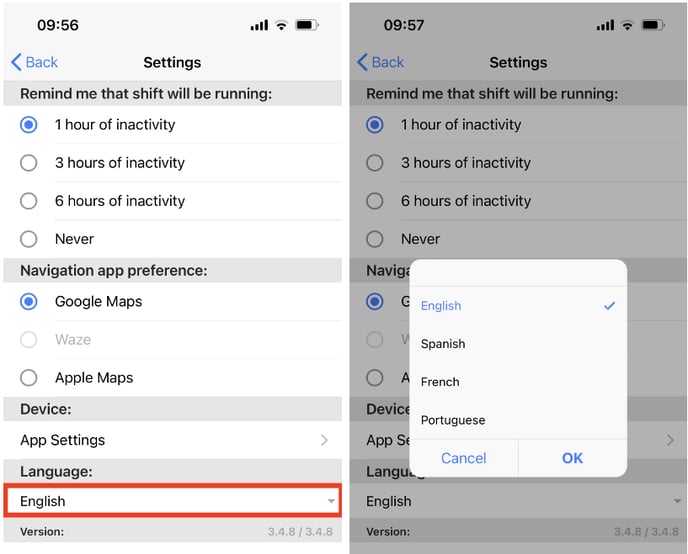
5. Switch Languages
The Yeti mobile app is available in four languages. Select your language by clicking 'Account' > 'Settings'.
Select the language by clicking on it.
6. Set the Quality of your Photos
You can choose the quality of the photo you want to take.
Click on Account > Settings > Choose the photo quality
Note: The operator cannot see the difference when taking photos. However, you will notice a difference when you download or open the photo on the Yeti web app.

7. Automatically Update Your Yeti App
It is important that you always have the most recent version of the Yeti mobile app so that you can take advantage of the new features released and correct bugs found in the previous version. Updating your application to the latest version improves security and stability.
The instructions below will show you how to set your device to update automatically, so you don't need to worry.
Follow the steps below according to your Android or iOS to set it as automatically updated.
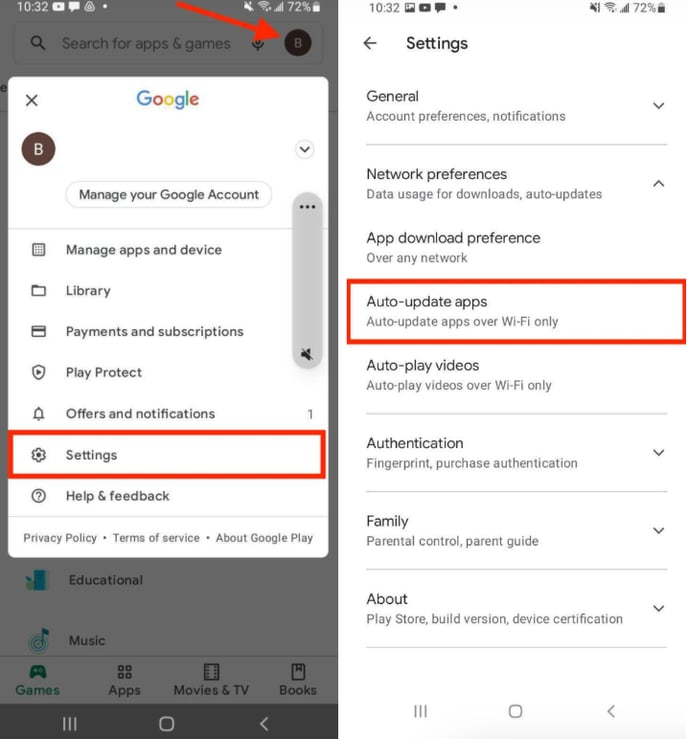
On your Android device:
- Click on your Play Store app > your avatar > Settings.
- Click on Network preferences > auto-update apps > select one of the options “over any network” or “over Wi-Fi only”.
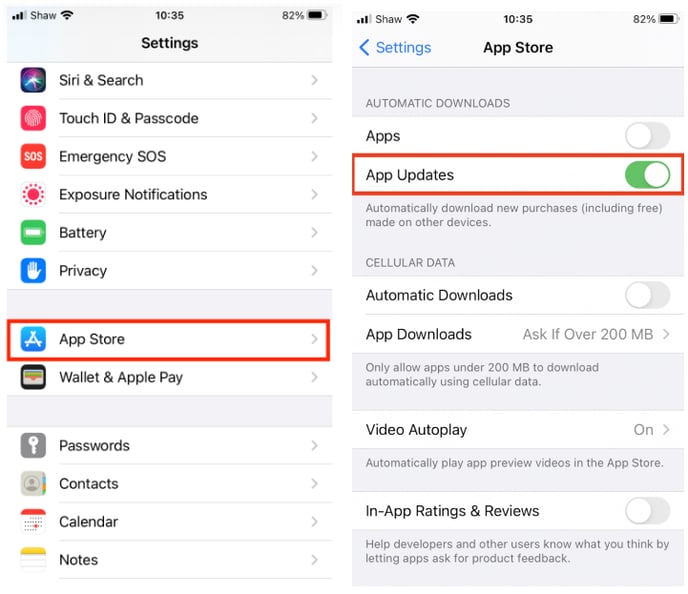
On your iOS device:
Click on 'Settings' > 'App Store' > enable 'App Updates'.
If you have any issues with your Yeti mobile app, please contact us:
support@yetisoftware.com