Route History Report
The Route History Report provides detailed information about the routes that have been performed.
Table of Contents:
- Route History Page
- Route History Record
- Map and Breadcrumbs
- Customize Column Display
- Export your Route History Records
- Using Search Filters
Route History Page
To get to the route history page, select the route down at the bottom of the navigation bar. In the report and history section.

Route History Record
Select a record to open it up.

A route history record consists of the following information:
- Route information which shows when the route was entered and includes geofence details. You'll also see two types of on-site time: one based on geofence entry and exit, and the other based on crew-reported time.

- Crew information which shows the operators names

- Sites Performed where you’ll see key timestamps such as when the service started and was completed, the total time spent on-site, and the geofence entry and exit times.

- This section displays a visual map of the route taken during the service, including GPS breadcrumbs that show where the operator traveled.

Map and Breadcrumbs
The Map and Breadcrumbs section gives you a visual timeline of an operator’s movements during a shift. It helps you verify that a site was visited and shows where and when key actions took place.
How Breadcrumbs Work
To enable breadcrumb tracking, operators must turn on Location Services in the Yeti mobile app. Once location is enabled, Yeti will automatically create breadcrumbs based on their actions and movements.
Breadcrumb Types and Icons
Breadcrumbs are color-coded and icon-based to help you quickly understand what happened and where. Click on each dot to see its details.
- Black Breadcrumbs – Created when an operator starts or finishes a site, or takes a photo.
- Blue Breadcrumbs – Represent ongoing location tracking as the operator moves throughout their route.
- Operator Icon – Shows the last known location of the operator.
- Map Pin Icon – Represents site locations. You can click on a site pin to view the information the operator entered about that site.

This feature gives you added transparency and accountability for services performed in the field.
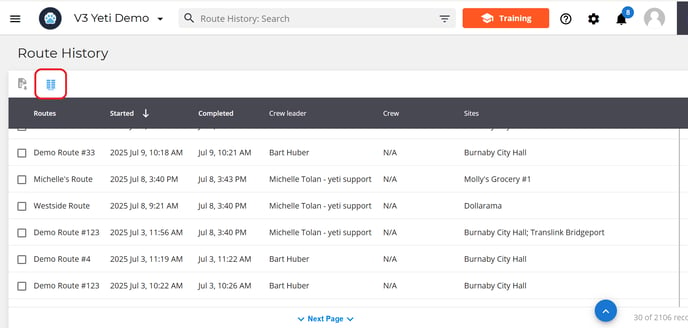
Customize Column Display
You can choose which columns are visible and set the order in which they appear. This configuration also determines how your service history data is exported when you use the Export to Spreadsheet button.
Click the Column Configuration button.


To hide a column, click the eye icon next to it. Hidden columns will not appear on your view page or in exported spreadsheets.

Once you click save you will see your changes on Route History page.

Export your Route History Records
You can export your records by selecting the checkmark beside the record itself and then selecting the download record button.

Using Search Filters
You can use the search filter to find specific records or group records by certain criteria.
To filter your data:
-
Type directly into the search bar, or

-
Click the search filter icon at the end of the search bar.

A pop-up will appear with a list of fields you can filter by (such as site, route, or user).
Note: All records shown after applying a filter can be exported at once.
If you run into any issues please contact support@yetisoftware.com